
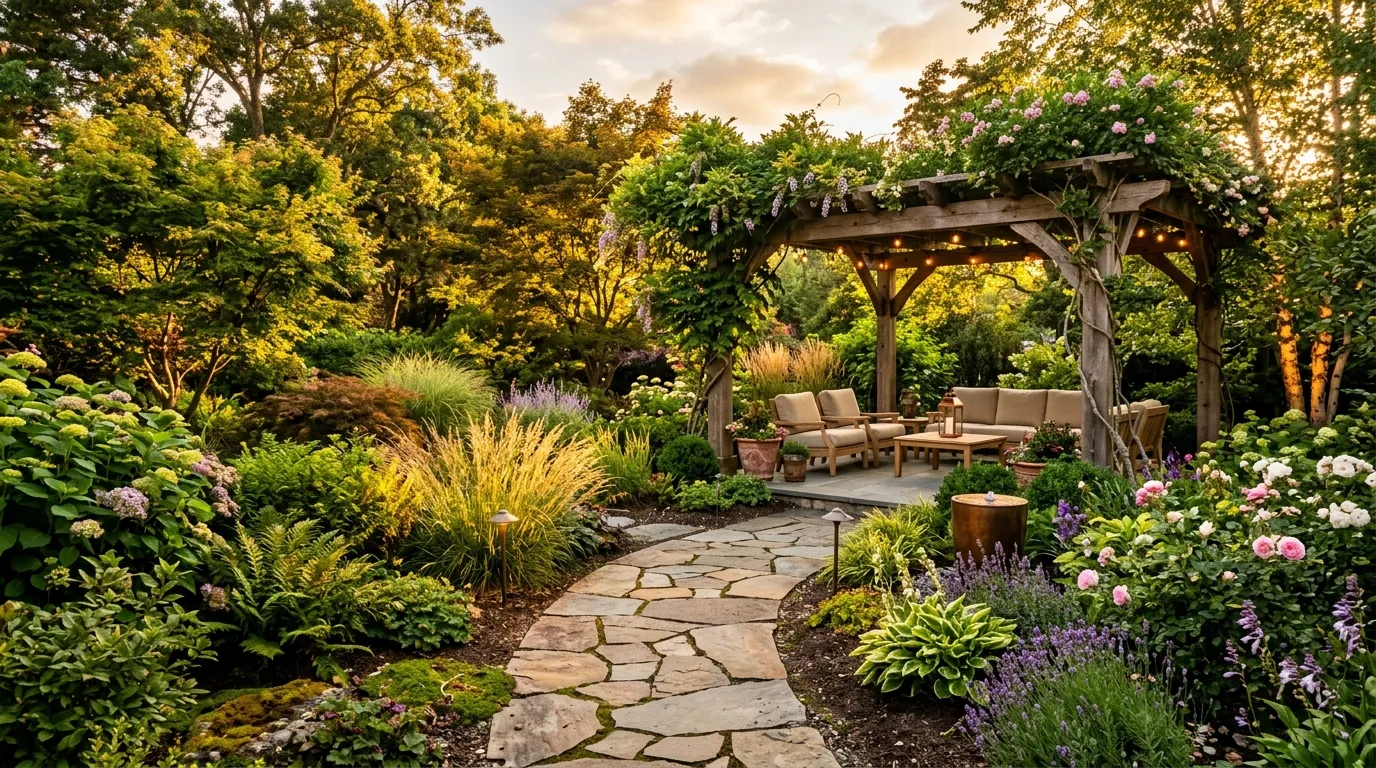
Every yard has potential, even the plainest patch of grass or the smallest concrete patio. The difference between a forgettable outdoor space and one that feels designed comes down to a handful of smart choices. You don’t need a landscaping degree or a huge budget to make your garden stand out. This list breaks down practical, creative ideas you can actually pull off yourself, using tools and materials you probably already have access to. Whether you’re working with a sprawling backyard or a tiny apartment balcony, these ideas will help you build a space that looks intentional, feels personal, and works for the way you actually live outside.
1. Mix Textures with Layered Planting
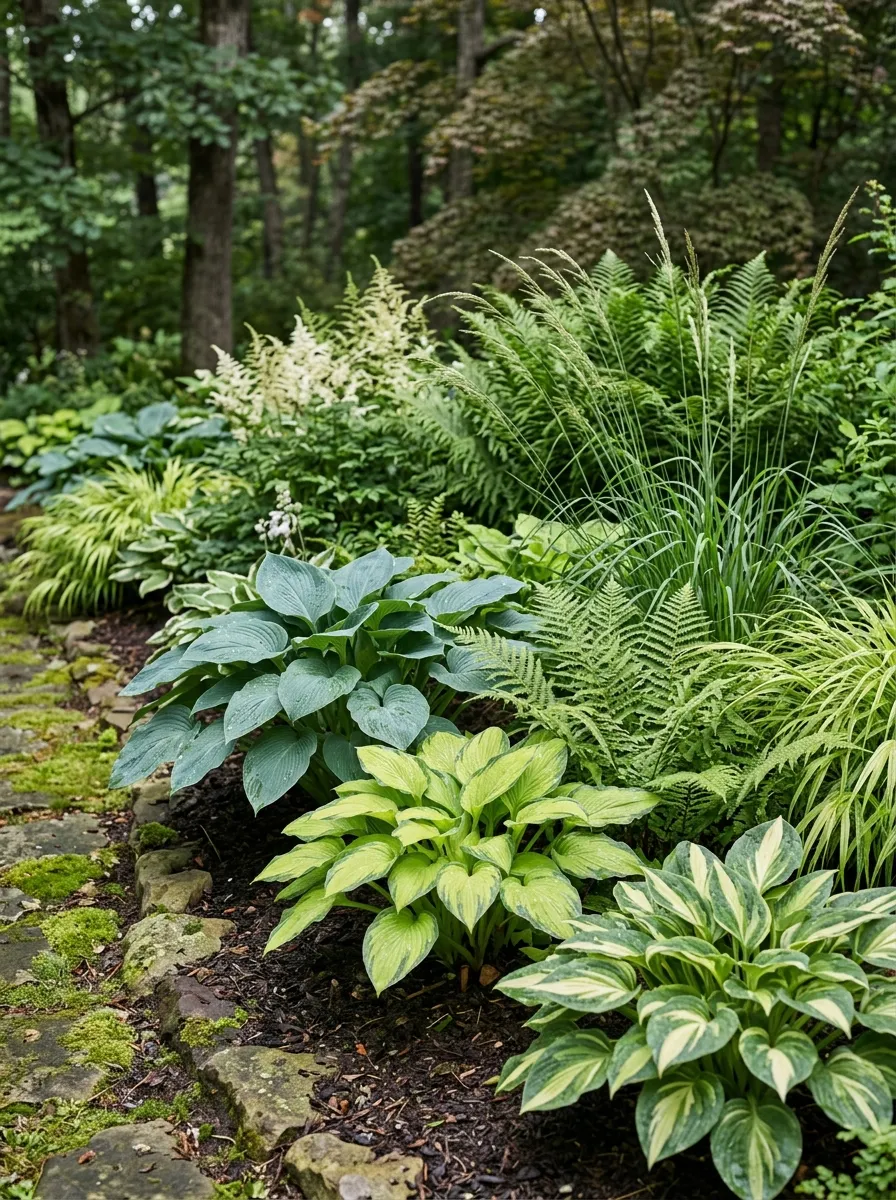
A garden feels flat when every plant is the same height and shape. Fix this by layering. Put tall plants like ornamental grasses in the back, medium shrubs in the middle, and low ground cover up front.
Mix leaf shapes too. Pair broad hosta leaves with feathery ferns and spiky sedges. This contrast catches the eye even without a single flower in bloom.
Budget tip: divide existing perennials instead of buying new ones. Many plants like hostas and daylilies can be split every few years, giving you free additions for other beds. Start with three plant types per layer and expand as you go. This layered approach works in beds of any size, from a narrow strip along a fence to a full backyard border. The goal is depth, not perfection—uneven, natural-looking layers usually read as more designed than perfectly matched rows.
2. Frame Your Garden with an Arbor Entrance
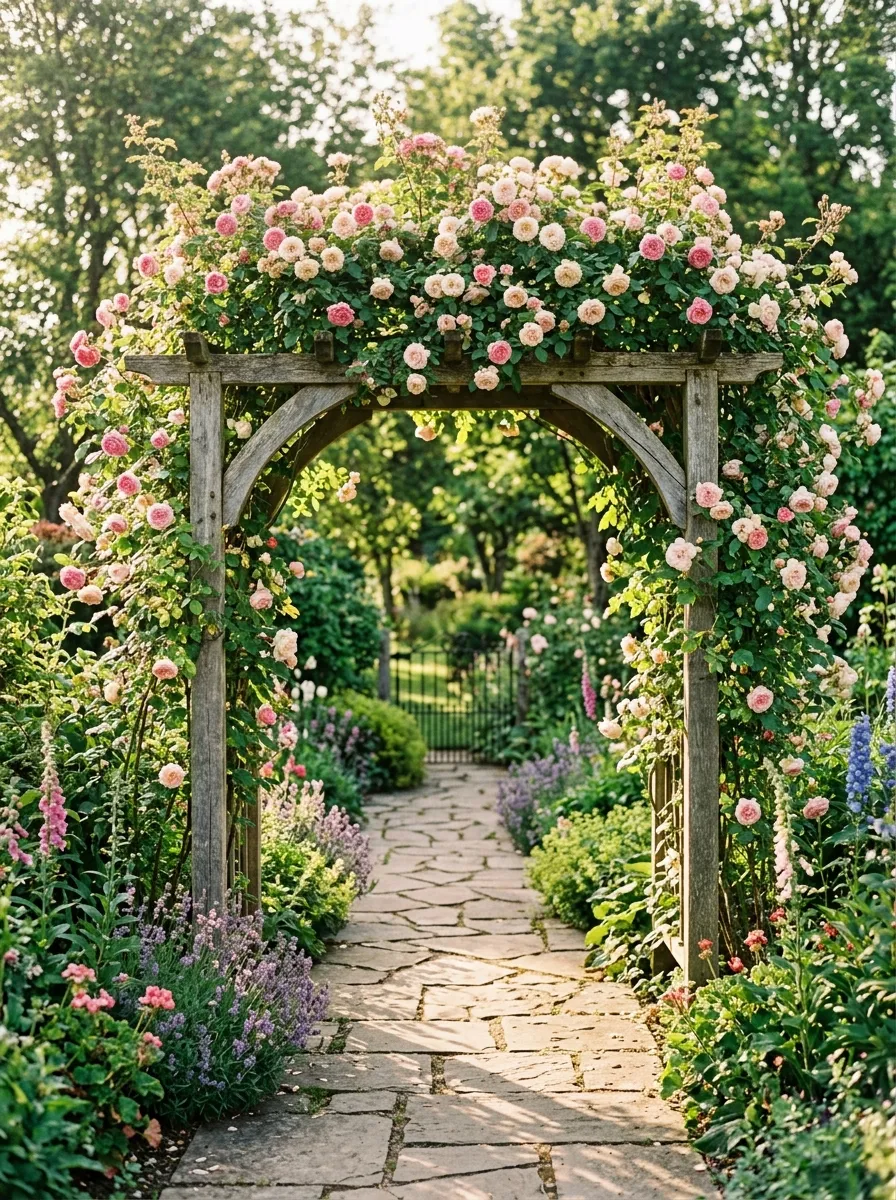
An arbor turns a plain garden entrance into a moment. Even a simple wooden frame placed at the start of a path signals that something special is ahead. Add a climbing plant like roses or clematis, and it becomes a living gateway within a season or two.
Build one from four wooden posts and a crossbeam, or buy a basic kit from a hardware store. Anchor the posts firmly in concrete or deep soil so it holds up through wind and weather.
DIY tip: repurpose an old door frame or salvaged lumber instead of buying new arbor kits. A coat of weatherproof stain gives reclaimed wood a fresh look for a fraction of retail cost. Place your arbor at the entry point of your garden, not in the middle, so it acts as a true threshold. This small structure changes how visitors experience your space from the very first step inside.
3. Use Mirrors to Expand a Small Garden
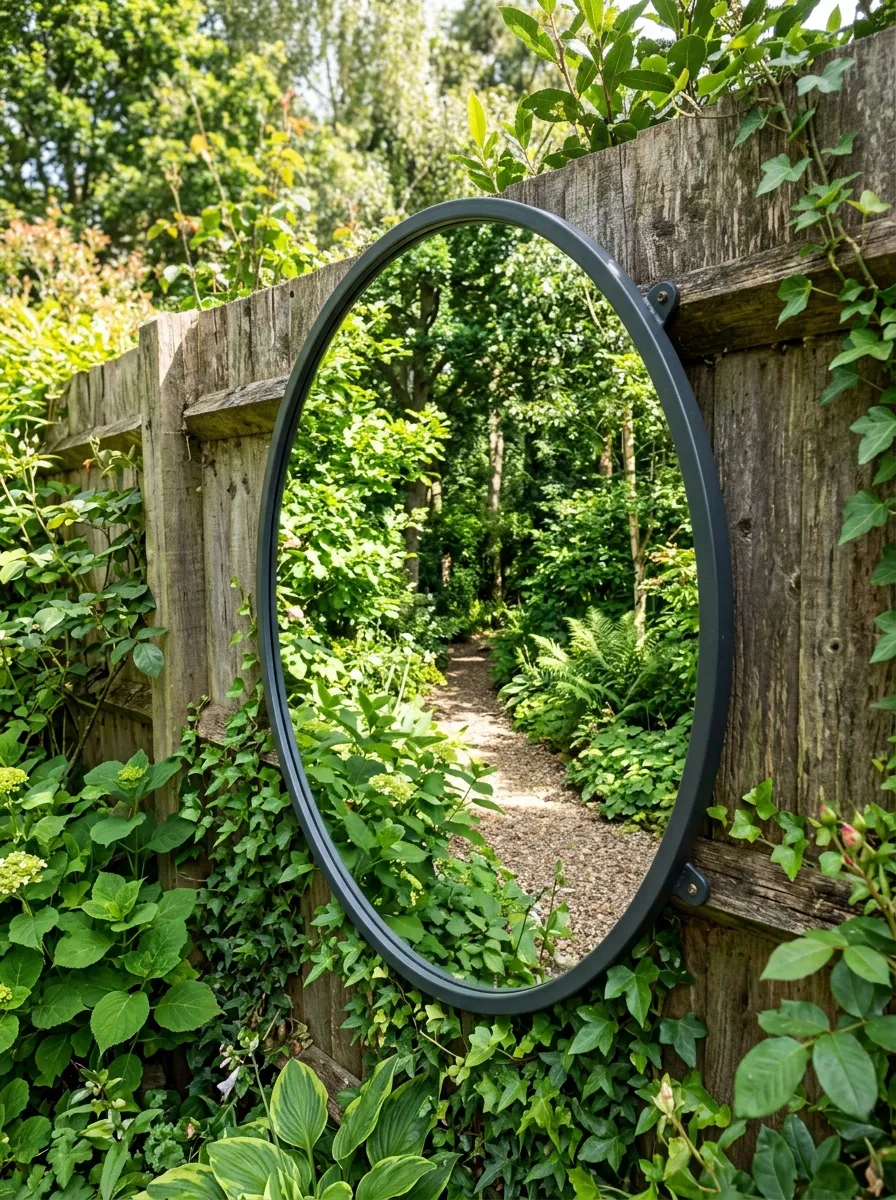
Small gardens can feel bigger with a simple trick: mirrors. Mount a weatherproof mirror on a fence or wall, angled to reflect nearby plants. This creates the illusion of extra depth, tricking the eye into seeing a larger space.
Choose outdoor-rated mirrors designed to handle rain and temperature swings. Position them where they reflect greenery rather than a blank wall, since the goal is doubling the plant view, not the fence itself.
Budget tip: an old window frame with a mirror insert, sourced secondhand, works just as well as a purpose-built garden mirror. Attach mounting brackets designed for outdoor use so it stays secure through wind and rain. This trick works best in shaded corners or narrow side yards where space feels tightest. Within one glance, a mirrored wall can make a cramped garden feel twice as open, without moving a single plant.
4. Add a Dry Creek Bed for Drainage and Style
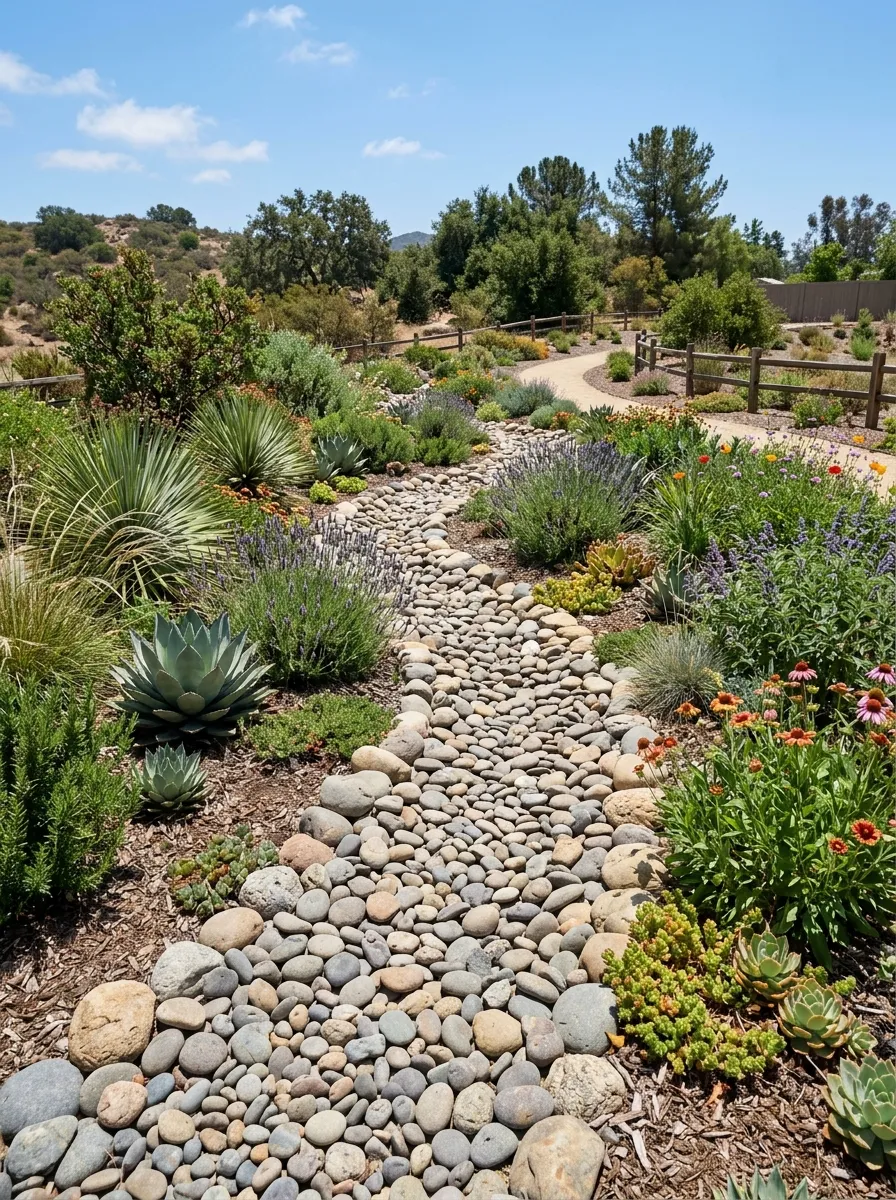
A dry creek bed solves drainage problems while adding a striking visual feature. Dig a shallow, winding trench where water tends to pool after rain. Line it with landscape fabric, then fill it with river rocks of varying sizes.
Place larger boulders at bends to mimic how real water carves a path. Plant drought-tolerant grasses or low shrubs along the edges to soften the transition between rock and soil.
Budget tip: mix pea gravel with a smaller number of larger accent stones instead of using all premium river rock—this cuts material costs significantly while keeping the natural look. This feature works well in yards with soggy spots or steep runoff areas. Beyond function, it adds movement and texture to flat garden beds, especially when paired with ornamental grasses that sway in the wind. It looks intentional even when your yard isn’t actively dealing with water issues.
5. Build a Vertical Pallet Garden
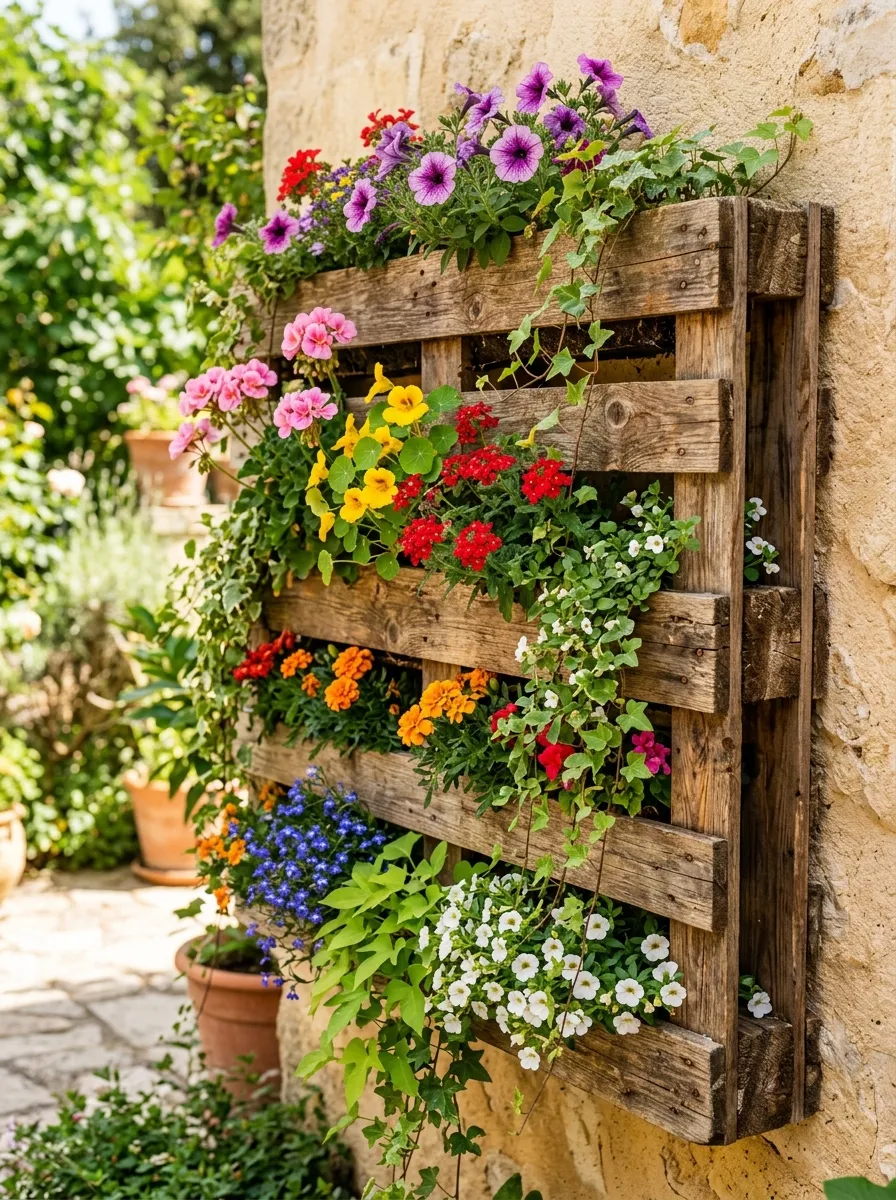
Pallet gardens make use of vertical space that would otherwise sit empty. Sand down an old wooden pallet, staple landscape fabric across the back and bottom of each slot, then fill each section with potting soil.
Lean the pallet against a wall or fence at a slight angle so soil doesn’t spill out. Plant shallow-rooted flowers or trailing vines like petunias or sweet potato vine in each pocket.
Budget tip: most pallets are free from hardware stores or shipping companies that just want them removed. This project costs little beyond soil and plants. Let the pallet sit flat on the ground for a couple of weeks after planting so roots establish before standing it upright. This setup works well on patios, balconies, or narrow side yards where ground space is limited. It turns a piece of scrap wood into a genuine garden feature.
6. Create a Focal Point with a Statement Plant
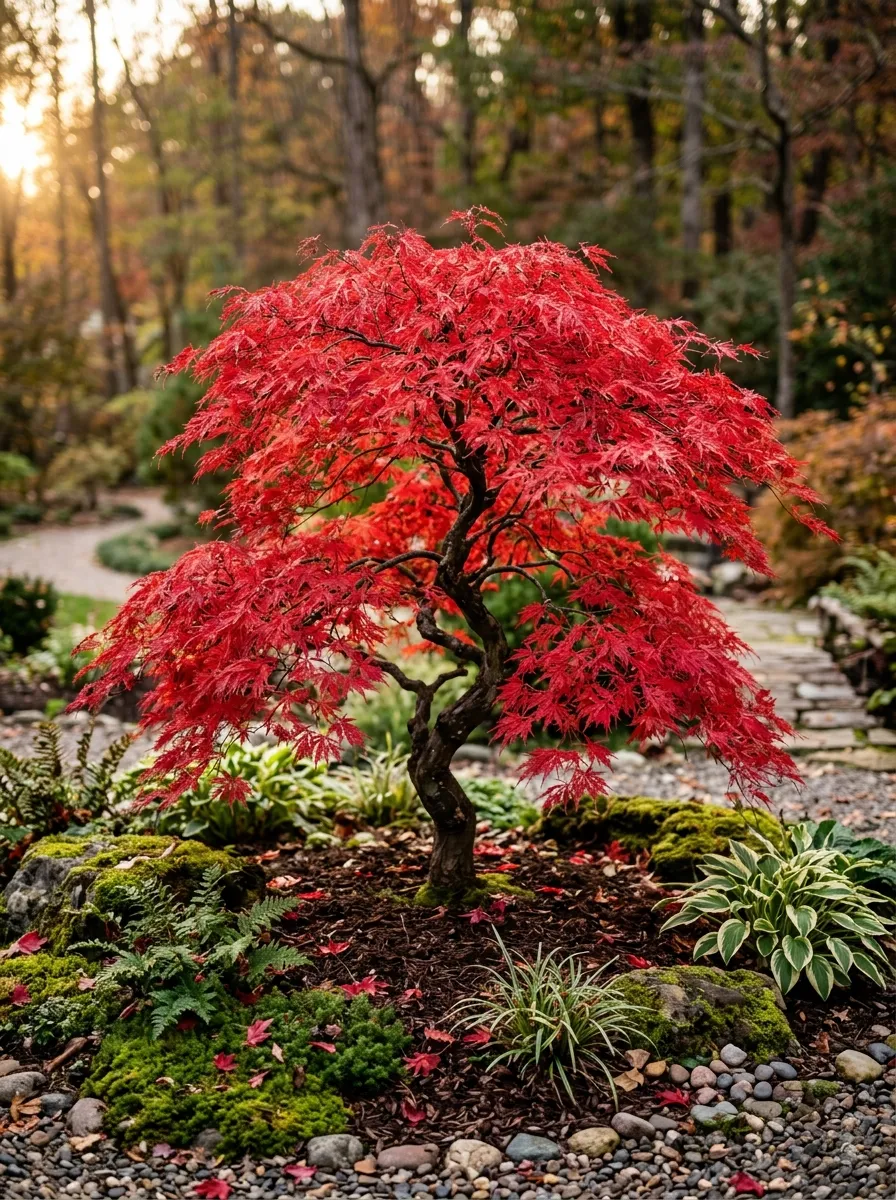
Every garden benefits from one plant that draws the eye first. This could be a Japanese maple with striking red leaves, a tall ornamental grass, or a sculptural agave. Place it where sightlines naturally land, like the end of a path or the center of a bed.
Surround your statement plant with simpler, lower plants that don’t compete for attention. This contrast makes the focal point stand out even more.
Budget tip: look for statement plants at end-of-season clearance sales, when nurseries discount stock before winter. A smaller, younger specimen costs far less than a mature one and will grow into its role over a few seasons. Avoid picking more than one or two focal points per garden area—too many competing centerpieces makes the space feel cluttered instead of guided. One strong anchor plant does more visual work than a dozen scattered accents.
7. Install a Pergola with Retractable Shade
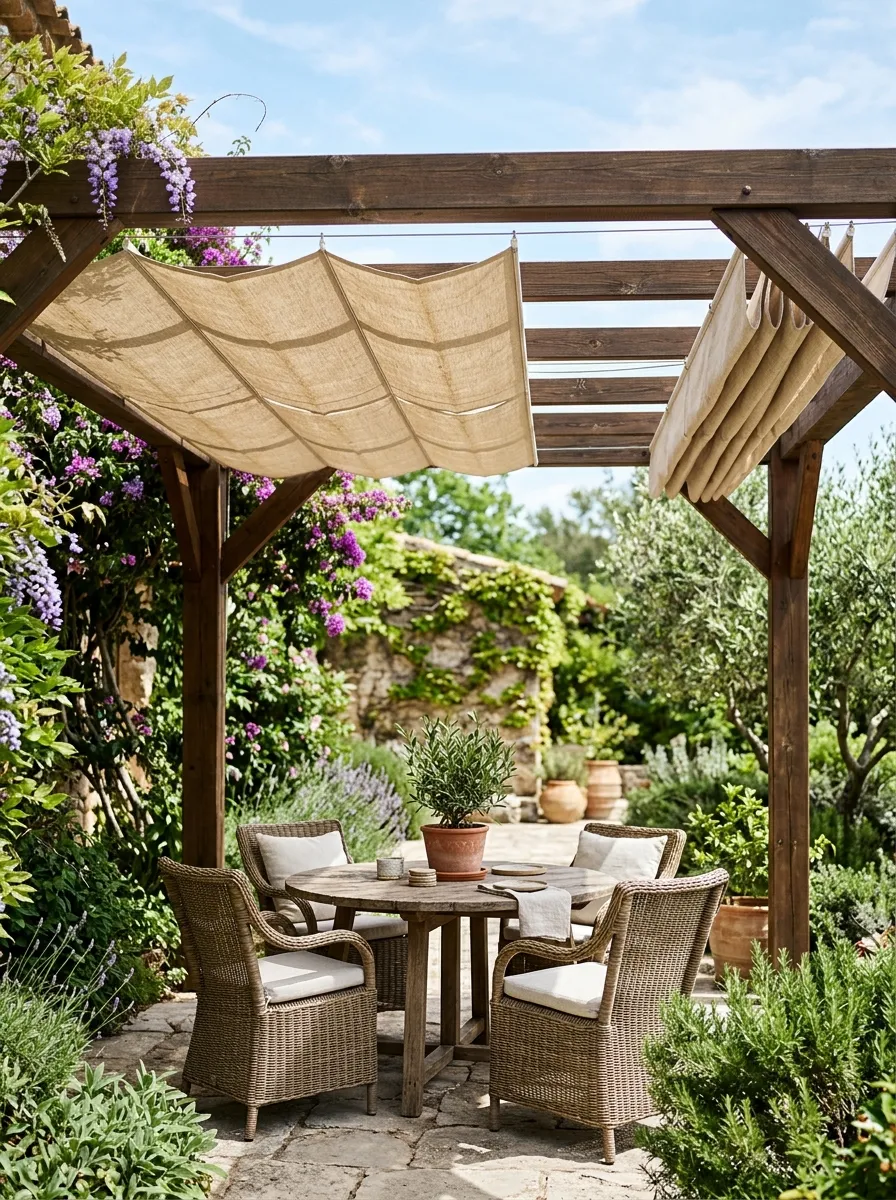
A pergola with retractable shade gives you control over sun exposure throughout the day. Build a basic wooden frame, then attach a canvas or outdoor fabric panel on a simple track system that slides open and closed.
Position the structure over a seating or dining area so you can adjust shade based on the time of day. Morning sun might call for full coverage, while evening light might not need any shade at all.
Budget tip: use outdoor curtain panels from a home store instead of a custom-built canopy system—they’re far cheaper and just as effective at blocking sun. Simple curtain rods or cable wire can hold the fabric in place. This setup works especially well over patios or decks where shade needs shift throughout the day. It’s a flexible upgrade that adapts to weather and season, rather than locking you into permanent shade or full sun exposure.
8. Plant a Moon Garden for Nighttime Beauty
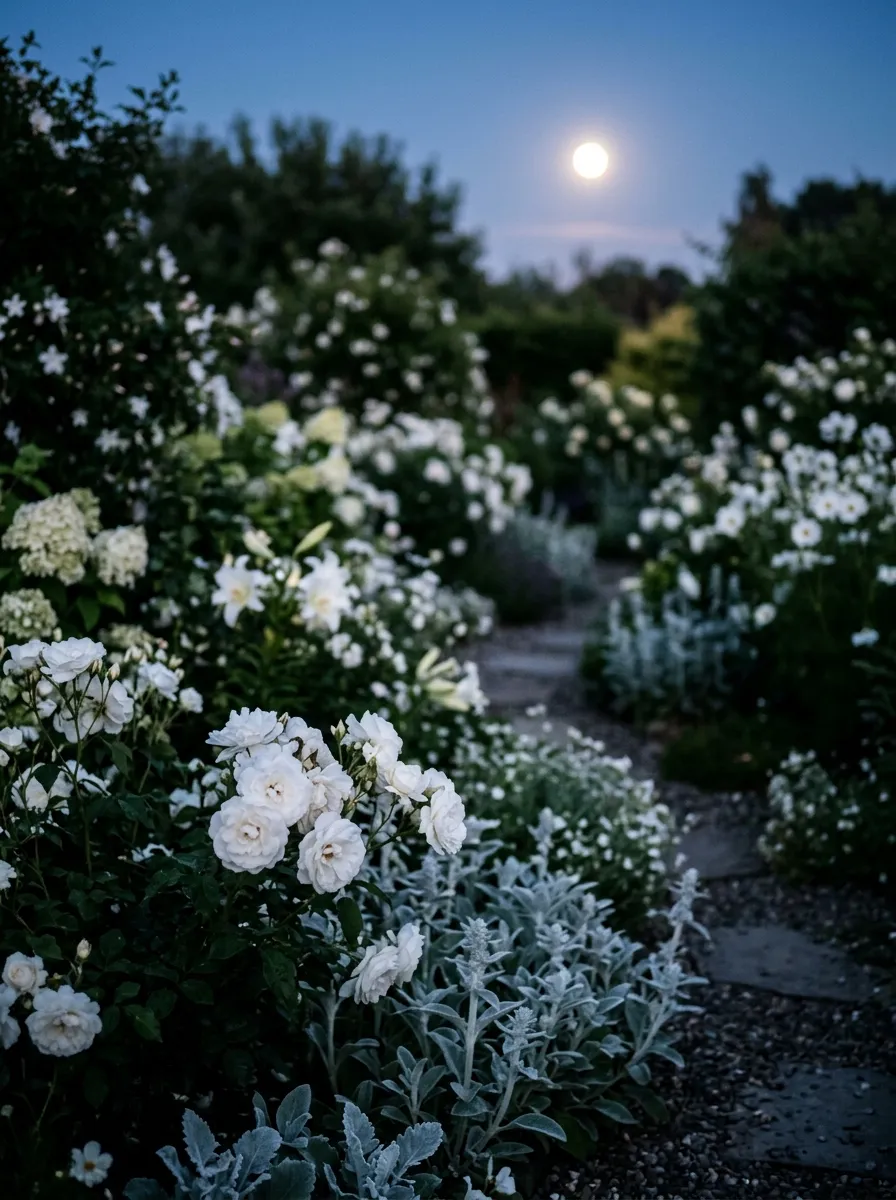
Moon gardens come alive after dark. Plant white and pale-colored flowers like white roses, moonflowers, and silver-leafed plants such as dusty miller. These colors reflect available light, making them glow even in low evening light.
Choose flowers that also release fragrance at night, like nicotiana or evening primrose, to add a sensory layer beyond just visuals. Group these plants near a patio or path where you’ll actually spend evening time.
Budget tip: grow moonflowers and nicotiana from seed—both germinate easily and cost very little compared to buying mature plants. Position your moon garden away from bright artificial lighting, since too much competing light diminishes the glowing effect these plants create naturally. This idea works particularly well for people who spend more time outside in the evening than during the day, turning a garden that’s easy to overlook at dusk into one that shines exactly when you’re there to see it.
9. Use Vertical Stacked Planters to Save Space
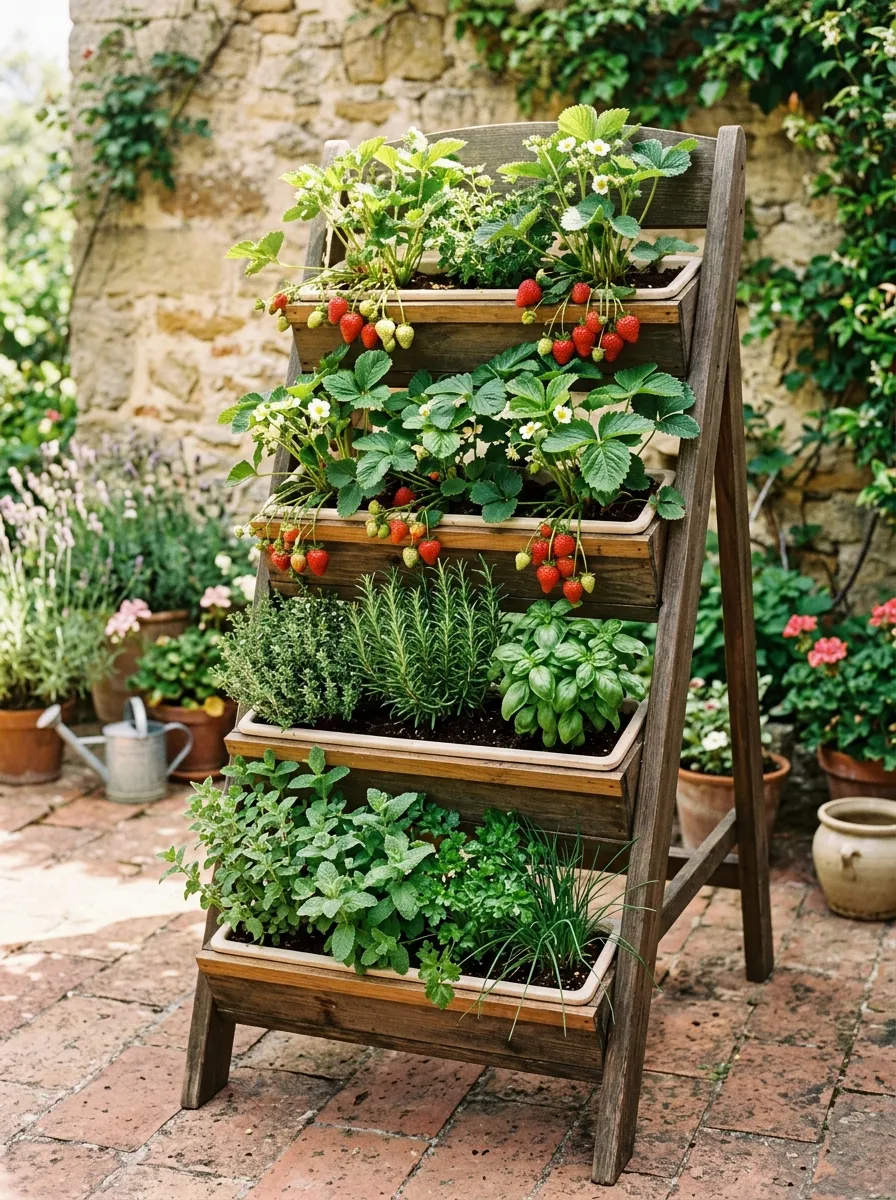
Stacked planters let you grow more in less space. These tiered structures hold multiple pots at different heights, making them perfect for strawberries, herbs, or small flowering plants on patios and balconies.
Build a simple version using wooden crates of decreasing size, stacked and secured with screws. Or buy a ready-made tiered planter stand from a garden center if building isn’t your thing.
Budget tip: repurpose old plastic totes or buckets by drilling drainage holes and stacking them at varying heights using bricks or cinder blocks as risers. This method costs almost nothing beyond containers you may already own. Stacked planters work especially well for renters who need portable garden solutions that don’t require digging into the ground. They also make watering and harvesting easier since everything sits at a manageable height instead of spread across a large area.
10. Add Color with a Painted Garden Fence
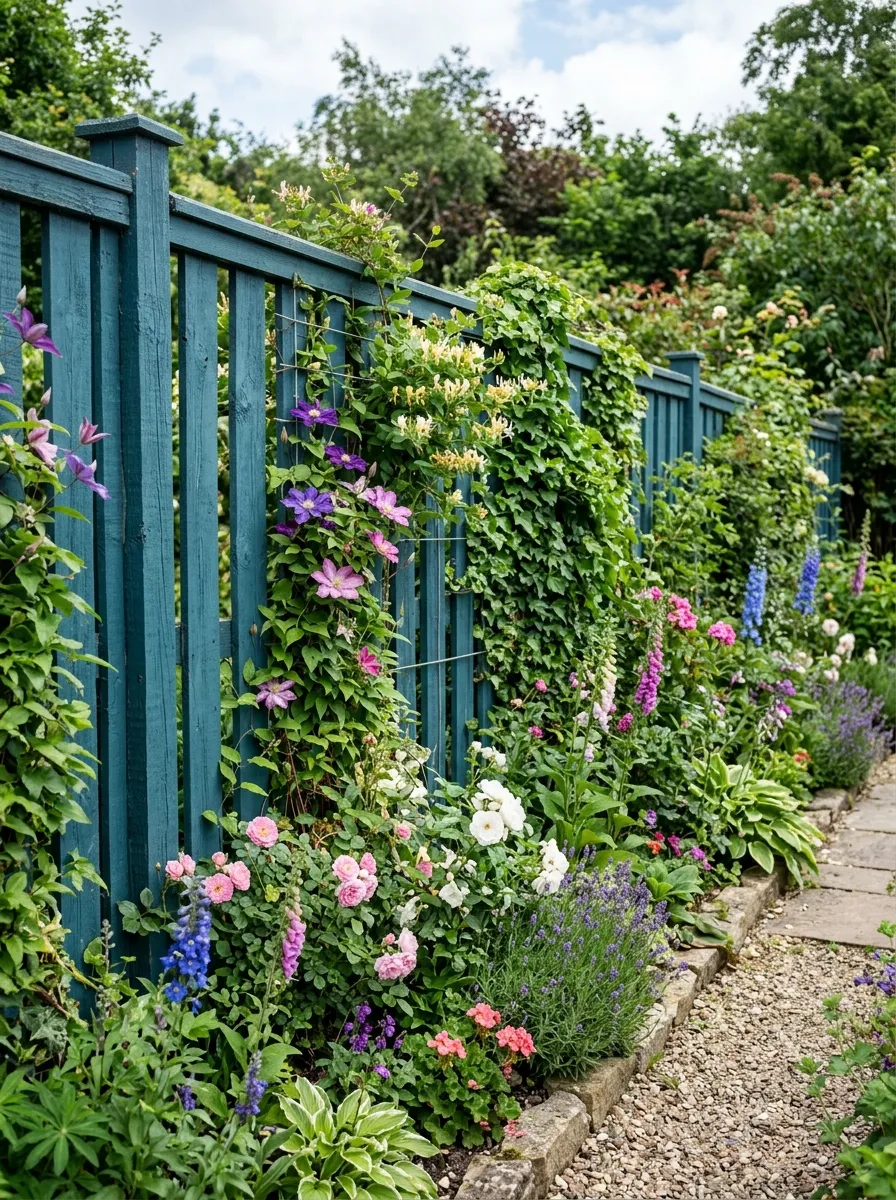
A painted fence changes the entire mood of a garden. Instead of leaving wood its natural color or default white, try a deep green, navy, or charcoal shade. Darker colors make plants in front of the fence pop with more contrast.
Clean and sand the fence first, then apply an exterior-grade paint or stain in your chosen color. Two coats usually give the best coverage and longest-lasting finish against weather.
Budget tip: buy mismatched or returned paint cans from the discount section of a hardware store—they’re often marked down significantly and still work fine for outdoor wood. This project can be done over a single weekend for even a decent-sized yard. A painted fence acts like a backdrop in a photograph, making every plant and feature in front of it look more intentional. It’s one of the highest-impact, lowest-cost changes you can make to a garden’s overall feel.
11. Build a Sunken Seating Area
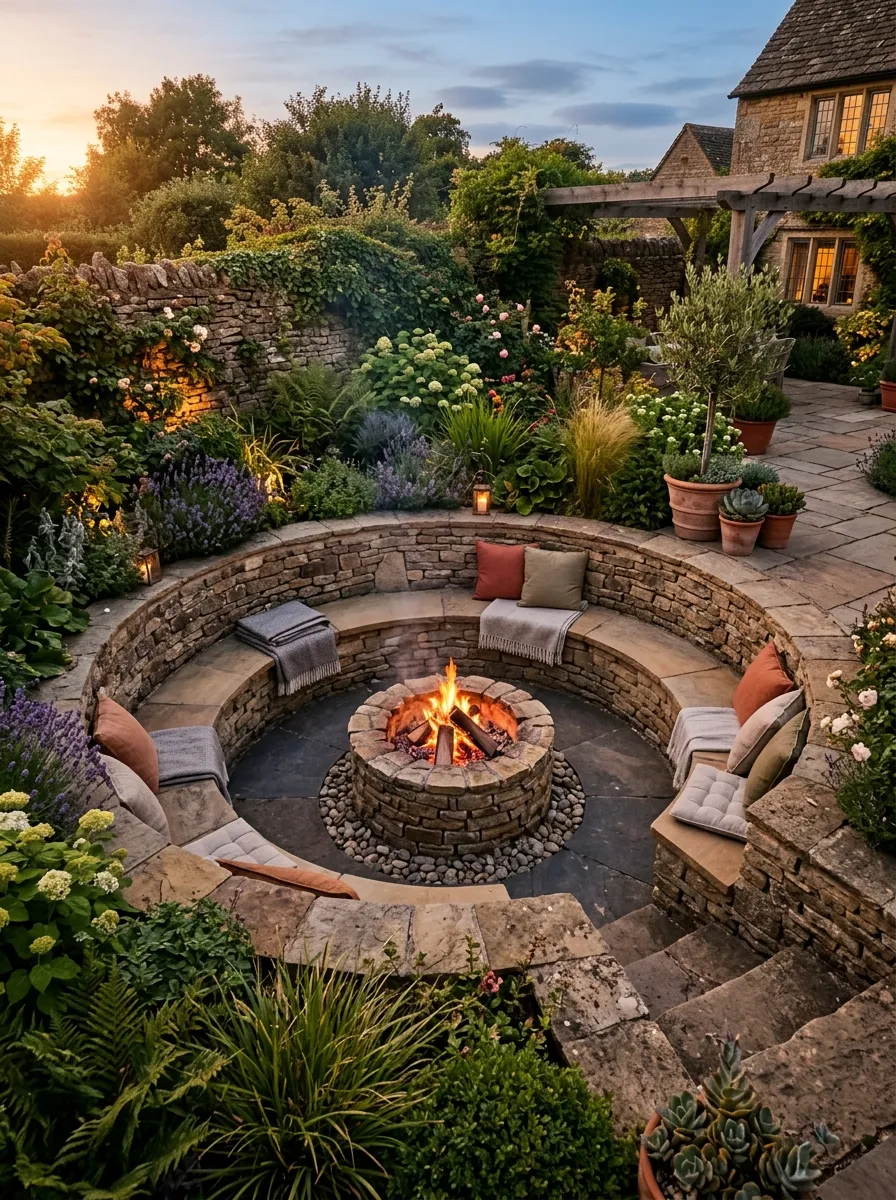
A sunken seating area creates a cozy, enclosed feeling without building any walls. Dig out a section of your yard about one to two feet deep, then line the edges with retaining wall blocks or timber to hold the surrounding soil in place.
Add built-in bench seating around the perimeter using the same retaining material, or bring in simple outdoor furniture instead. A small fire pit or low table in the center completes the space.
Budget tip: use urbanite, which is broken concrete from old sidewalks or driveways, as a free alternative to purchased retaining blocks. This project takes more labor than most on this list, but the payoff is a genuinely unique gathering spot. The sunken design naturally blocks wind, making it more comfortable to sit outside on cooler evenings. It also creates a clear visual separation between your seating area and the rest of the garden.
12. Grow an Edible Flower Border
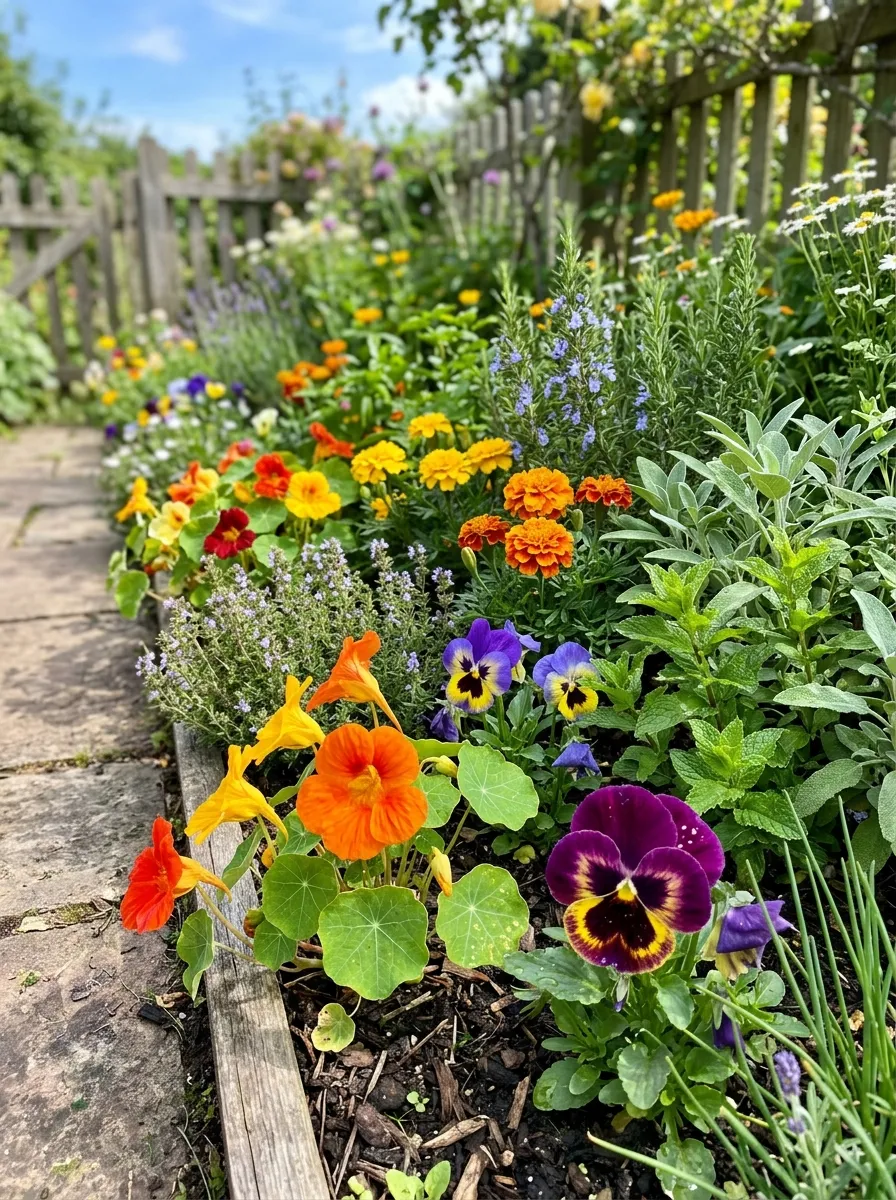
Edible flowers do double duty in a garden. They look beautiful and you can actually eat them. Nasturtiums, pansies, marigolds, and calendula all produce colorful blooms safe to add to salads or use as plate garnishes.
Plant these along a border near your kitchen door or vegetable patch so they’re easy to reach when cooking. Most edible flowers grow easily from seed and don’t need special soil or care beyond regular watering.
Budget tip: nasturtium seeds are inexpensive and often reseed themselves year after year, meaning one packet can supply your garden indefinitely. Avoid using pesticides on any plants you plan to eat, and always confirm a flower is safe for consumption before adding it to food. This border gives your garden a practical purpose beyond looks, turning a simple flower bed into something that also shows up on your dinner table throughout the growing season.
13. Create a Gravel Patio with Furniture
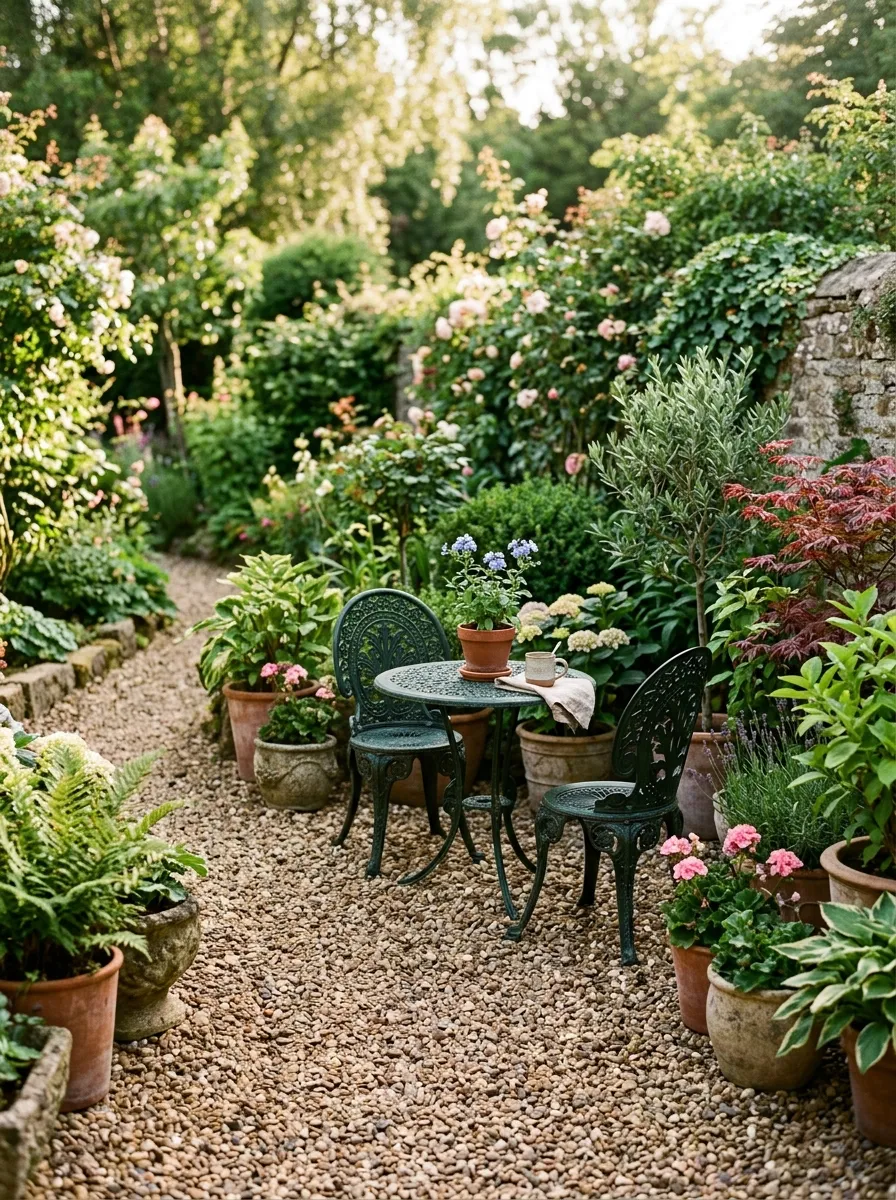
A gravel patio costs far less than poured concrete or pavers but still gives you a defined outdoor living space. Mark out your patio area, remove the grass, and lay a base of crushed gravel or decomposed granite, tamping it down firmly.
Add a simple bistro set or a couple of folding chairs once the gravel settles. Surround the edges with potted plants or low borders to give the space a finished look.
Budget tip: buy gravel in bulk from a landscaping supplier rather than bagged gravel from a retail store—bulk pricing can cut your material cost by more than half. This type of patio drains well and rarely cracks or shifts like concrete can over time. It’s also one of the fastest DIY patio options, often completed in a single weekend. This makes it a solid choice for renters or anyone who wants outdoor seating without a major construction project.
14. Add Depth with Multi-Level Plant Stands
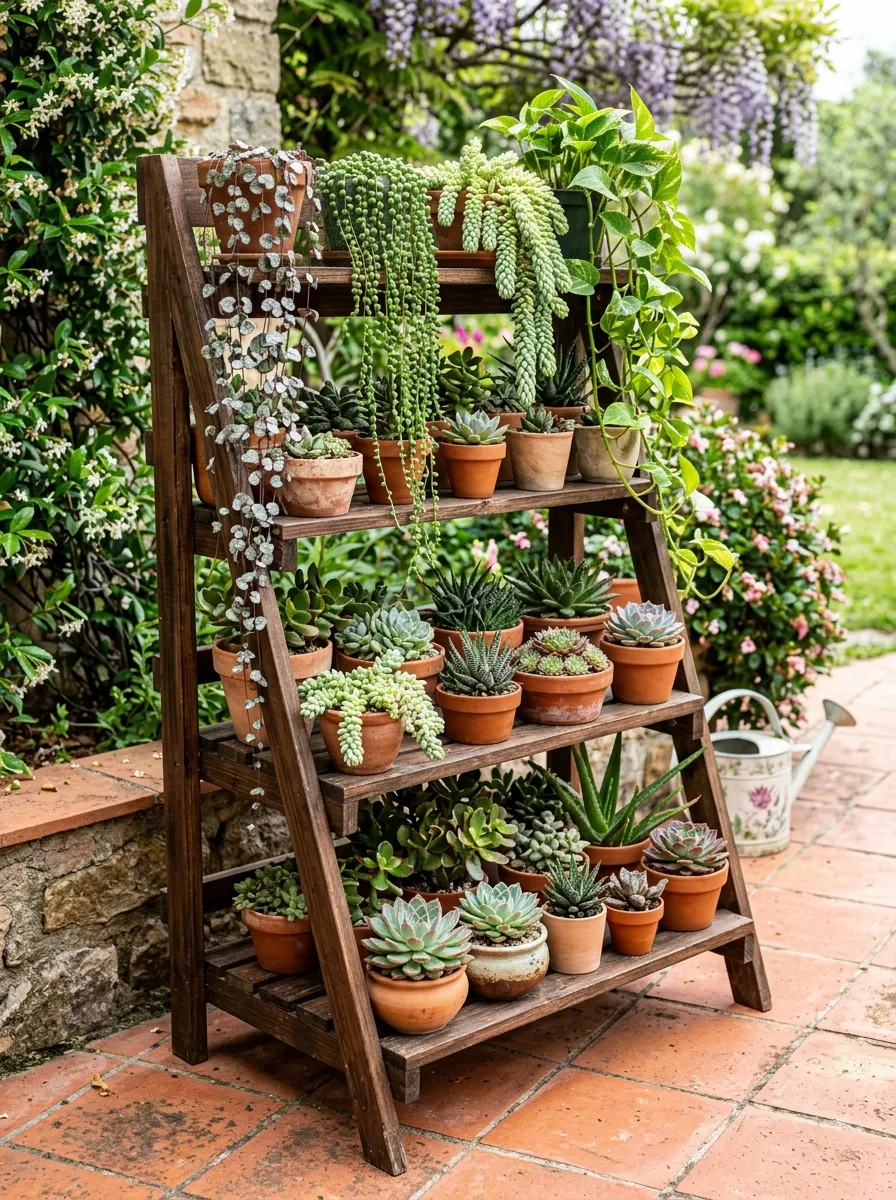
Multi-level plant stands add visual interest to flat patio or balcony spaces. Instead of lining pots up at the same height, a tiered stand lets plants cascade downward, creating a fuller, more dynamic display.
Build a simple version using scrap wood cut into stepped shelves, or repurpose an old ladder by laying boards across the rungs to hold pots at different levels. Group plants with similar light needs together on each tier.
Budget tip: an old wooden ladder found at a garage sale makes one of the easiest and cheapest plant stands available—just add flat boards across a few rungs for stability. This setup works especially well in small spaces where floor room is limited but vertical space is available. Trailing plants like ivy or string of pearls look particularly good on the top tier, spilling downward and softening the stand’s structure as they grow.
15. Install a Living Wall Panel
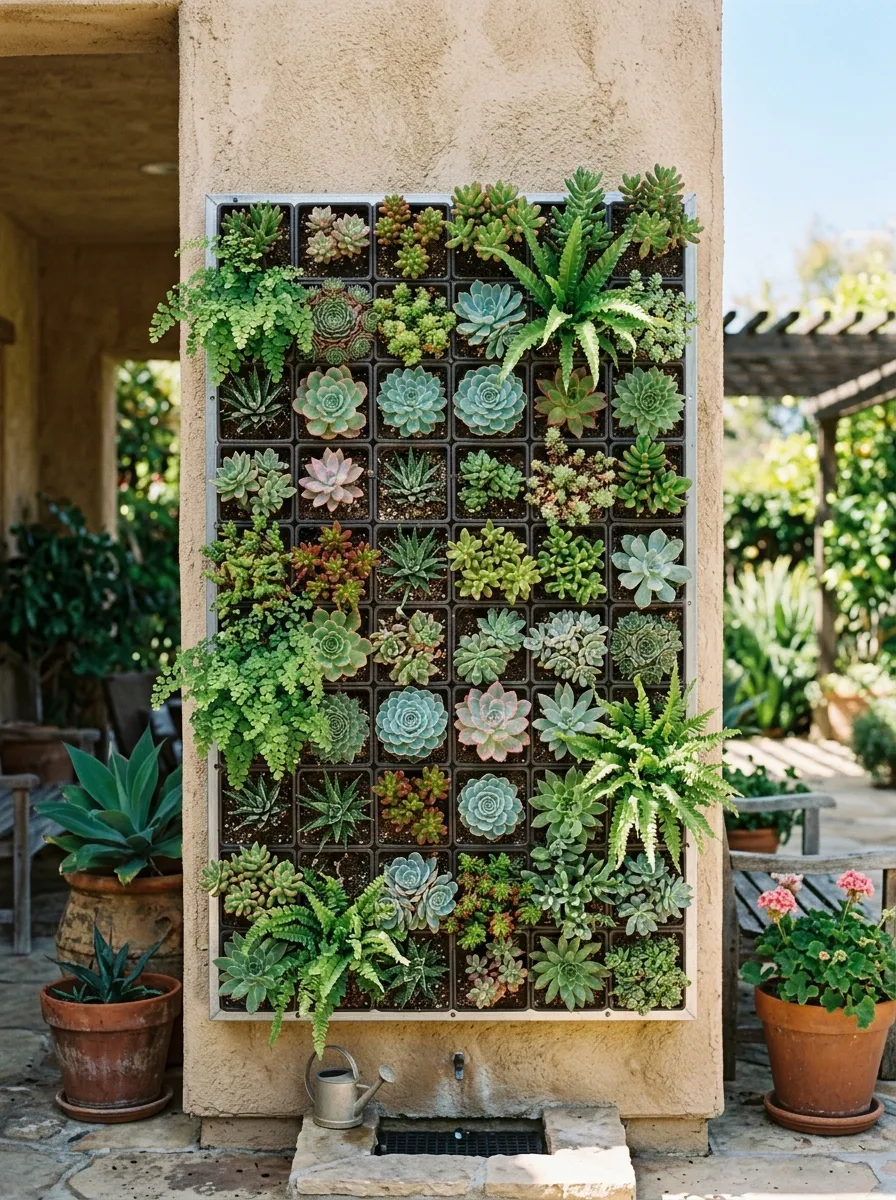
Living walls turn blank vertical surfaces into dense, textured greenery. Modular panel systems let you plug individual plants into a grid, creating a full wall of foliage without ground space.
Mount the panel frame securely to a wall or fence, then insert small pots or plugs of succulents, ferns, or herbs into each opening. Water using a simple drip system or by hand, depending on the panel’s design.
Budget tip: build a basic version using a wooden pallet lined with landscape fabric and small planting pockets, rather than buying an expensive pre-made panel system. This DIY route costs a fraction of commercial living wall kits. Living walls work particularly well on patios, balconies, or narrow side yards where there’s no room for traditional beds. Once established, the plants fill in tightly, creating a green surface that changes how an entire wall feels.
16. Add a Whimsical Garden Sculpture
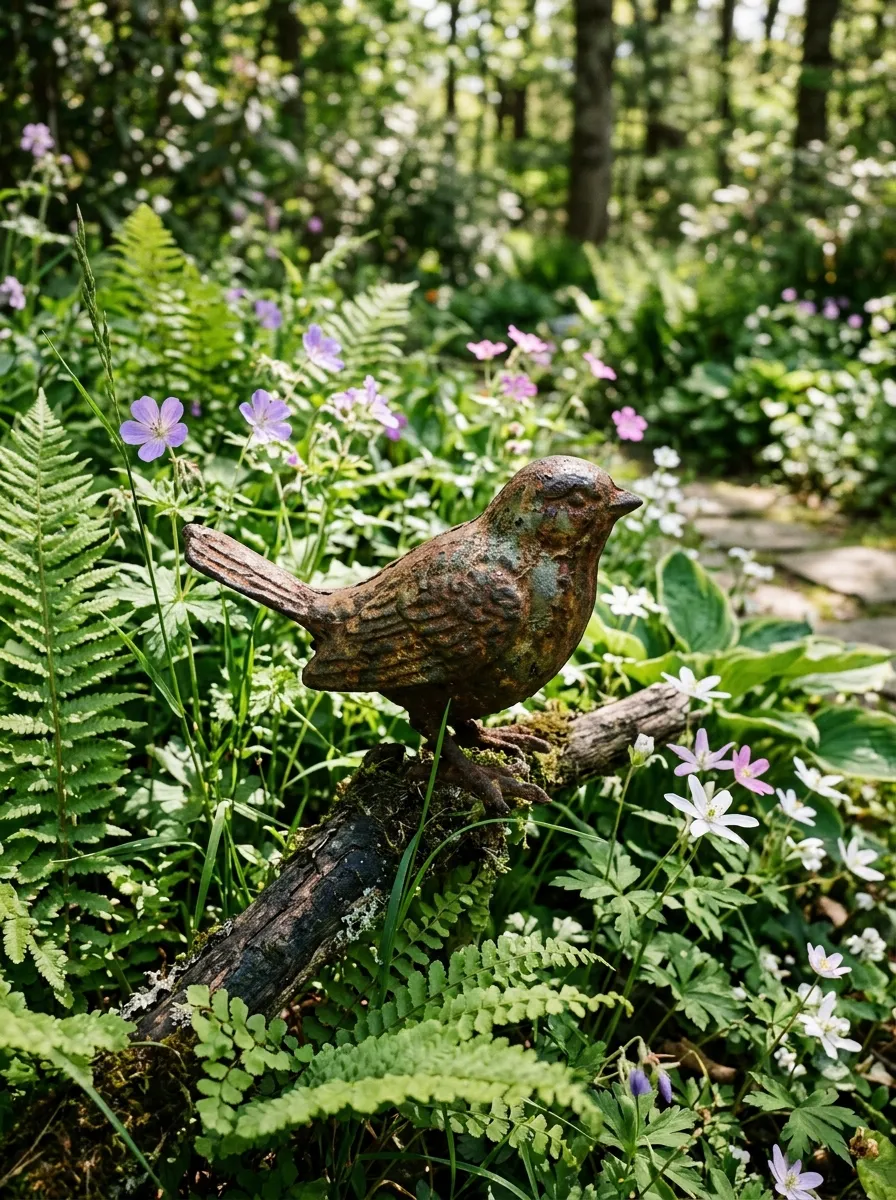
A single sculpture gives a garden personality. This doesn’t need to be an expensive art piece. A weathered metal bird, a ceramic animal figure, or even a repurposed piece of driftwood can serve as a quiet focal point tucked among your plants.
Place your sculpture where it peeks through foliage rather than sitting fully exposed. This creates a small moment of discovery as people walk through the space, rather than an obvious display.
Budget tip: thrift stores and estate sales often have unique garden decor pieces for a few dollars, far less than buying new from a garden center. You can also make your own using scrap metal, old tools, or reclaimed wood shaped into simple forms. One well-placed sculpture does more for a garden’s character than several scattered decorations. Keep it to one or two pieces per garden section so each one still feels intentional rather than cluttered.
17. Build a Raised Herb Spiral
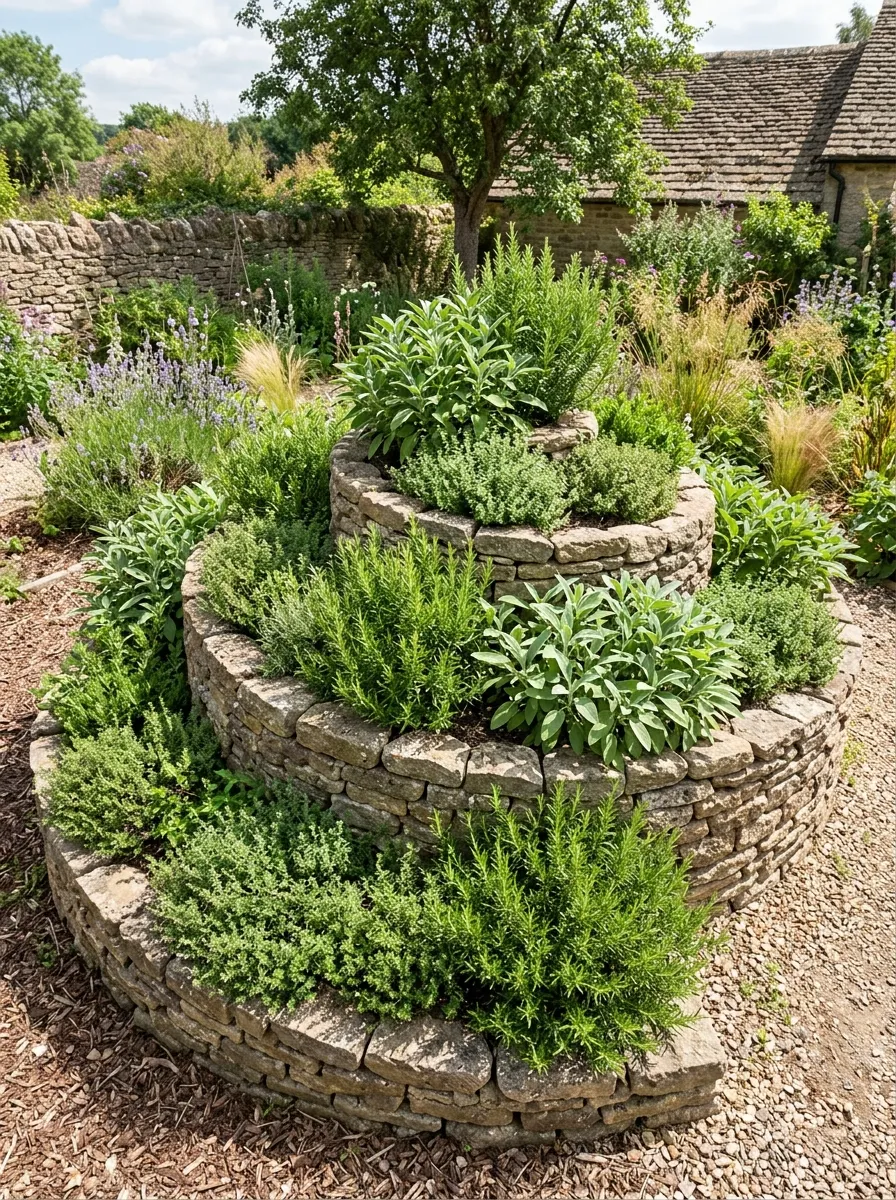
An herb spiral packs a variety of plants into a small footprint while creating different growing conditions in one structure. Stack stones or bricks in a rising spiral shape, filling the center with soil as you build upward.
The top of the spiral drains faster and gets more sun, making it ideal for drought-tolerant herbs like rosemary and thyme. The base stays moister, better suited for herbs like mint or parsley that prefer damp soil.
Budget tip: use broken bricks or leftover stones from other projects instead of buying new material specifically for this structure. A herb spiral typically only needs a three to four foot diameter, making it perfect for small yards or even large patio containers. This design also looks visually interesting on its own, functioning as both a growing space and a sculptural garden feature that changes texture and height as you look inward toward the center.
18. Create a Butterfly Puddle Station
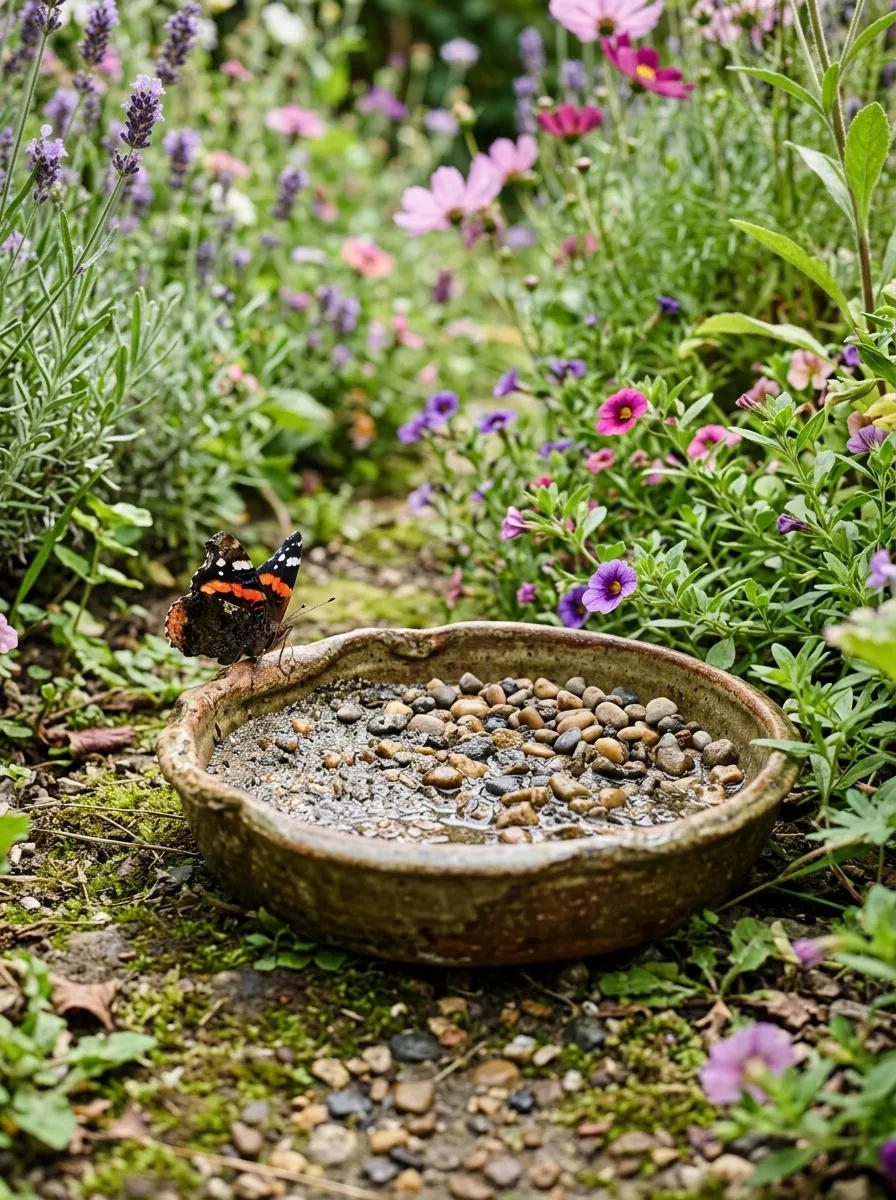
Butterflies need more than flowers-they also need minerals found in damp soil. A puddle station gives them a spot to gather these nutrients while adding a small, functional feature to your pollinator garden.
Fill a shallow dish or terracotta saucer with coarse sand, then add small pebbles for butterflies to land on. Keep the sand consistently damp, checking every few days depending on weather and evaporation rates.
Budget tip: An old plant saucer or shallow bowl works perfectly for this project, meaning you likely already have what you need at home. Place the station near your flowering plants but in a sunny, open spot, since butterflies prefer basking in direct light while they feed. This small addition rounds out a pollinator-friendly garden, giving butterflies everything they need in one compact area rather than just flowers alone. For a simple step-by-step guide, check out these DIY butterfly puddler ideas to create a welcoming water and mineral station for butterflies in your garden.
19. Design a Zen Gravel Garden
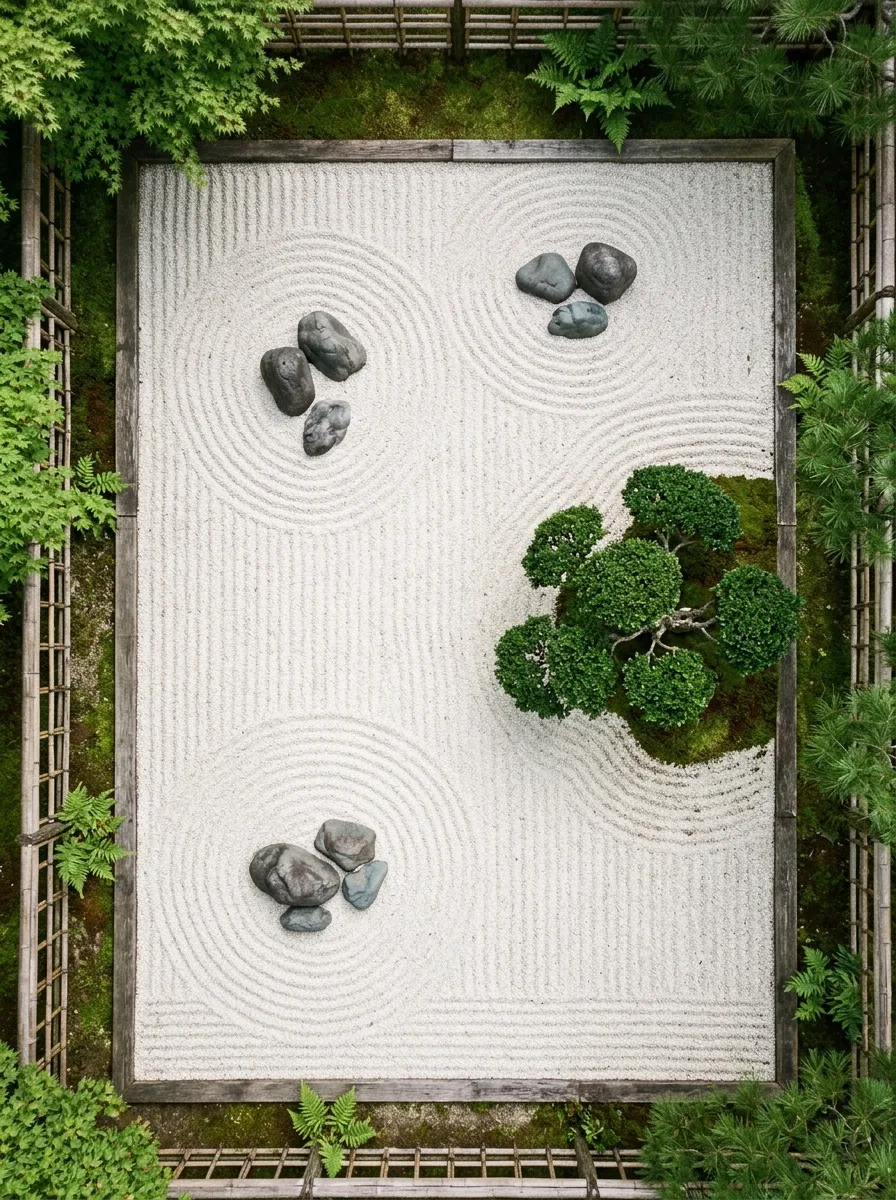
A zen gravel garden brings a calm, minimalist feel to any outdoor space. Rake fine gravel into simple wave patterns around a few carefully placed stones and one or two sculpted plants, like a dwarf pine or clipped boxwood.
Keep the plant palette limited here. This style relies on negative space and texture rather than variety, so resist the urge to add too many elements. A simple wooden rake helps maintain the gravel pattern over time.
Budget tip: pea gravel from a landscaping supplier costs far less than decorative white stone, and still creates the same raked texture effect. This garden style works especially well in small courtyards or side yards where a full planting bed isn’t practical. Beyond looks, maintaining the raked pattern becomes a quiet, repetitive task many people find calming in itself, adding a meditative element to garden upkeep that goes beyond typical weeding and watering.
20. Add an Outdoor Rug for Defined Spaces
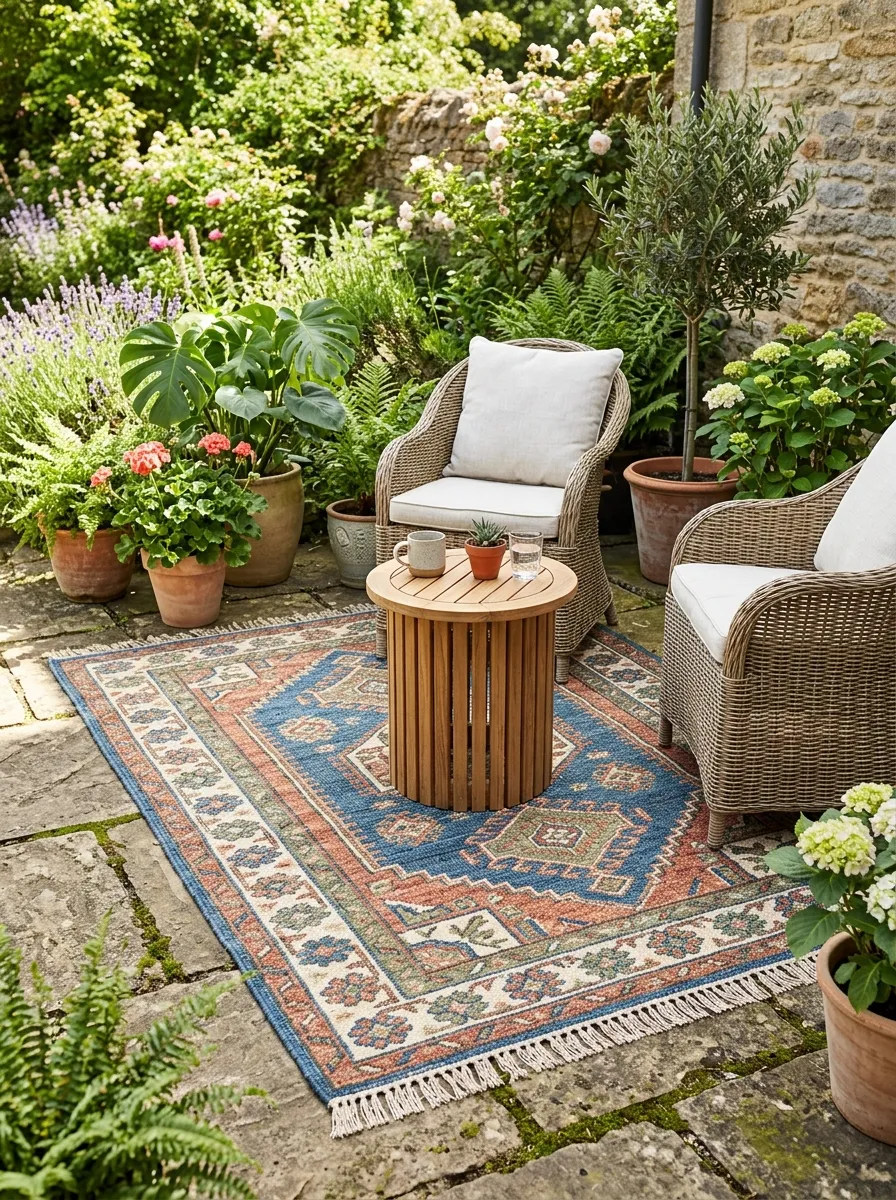
An outdoor rug instantly defines a seating or dining area within your garden. Without one, furniture can feel like it’s floating in open space. With one, the same setup suddenly feels like an actual room.
Choose a rug made from polypropylene or another weather-resistant material designed to handle rain and sun exposure. Lay it under your patio table or lounge chairs, then arrange furniture within its edges to reinforce the defined space.
Budget tip: check discount home stores or end-of-season sales for outdoor rugs, which often drop significantly in price once summer ends. A smaller rug also costs less and still works well for compact seating areas. This simple addition makes a patio or gravel area feel finished without any construction or planting involved. It’s one of the fastest ways to make an outdoor space feel styled rather than incidental.
21. Build a Wildlife Brush Pile
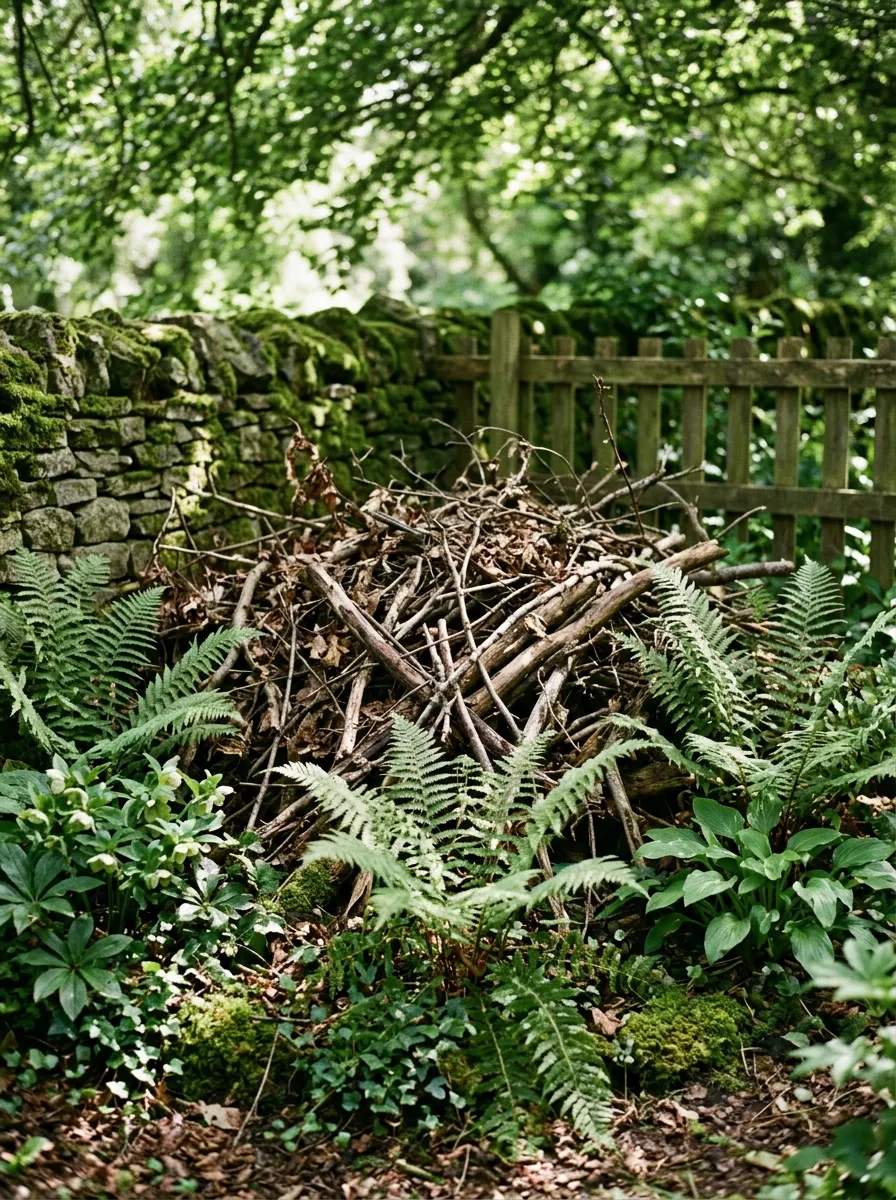
A brush pile gives small wildlife like birds, toads, and beneficial insects a place to shelter. Instead of hauling away every fallen branch after a storm or pruning session, stack them loosely in an out-of-the-way corner of your yard.
Build the pile with larger branches on the bottom and smaller twigs layered on top, leaving gaps for animals to move through. Place it near existing shrubs or a shaded area where it blends naturally into the landscape.
Budget tip: this project costs nothing since it only uses materials you’d otherwise throw away or send to yard waste pickup. A brush pile supports the kind of biodiversity that keeps pest populations in check naturally, since many beneficial insects and birds that shelter there also feed on garden pests. It doesn’t need to look messy either—tucked into a back corner behind taller plants, it stays functional without disrupting the rest of your garden’s design.
Conclusion
Great garden design comes from small, deliberate choices rather than one massive overhaul. Layered planting, a painted fence, a repurposed pallet, or a simple stepping stone path can each change how your outdoor space feels without draining your savings. Pick a handful of ideas from this list that match your yard’s size, sunlight, and your own weekend availability, then work through them one project at a time. Every change you make adds another layer of character to a space you’ll actually want to use. Start with the idea that excites you most, and let your garden grow into something that feels genuinely yours.