
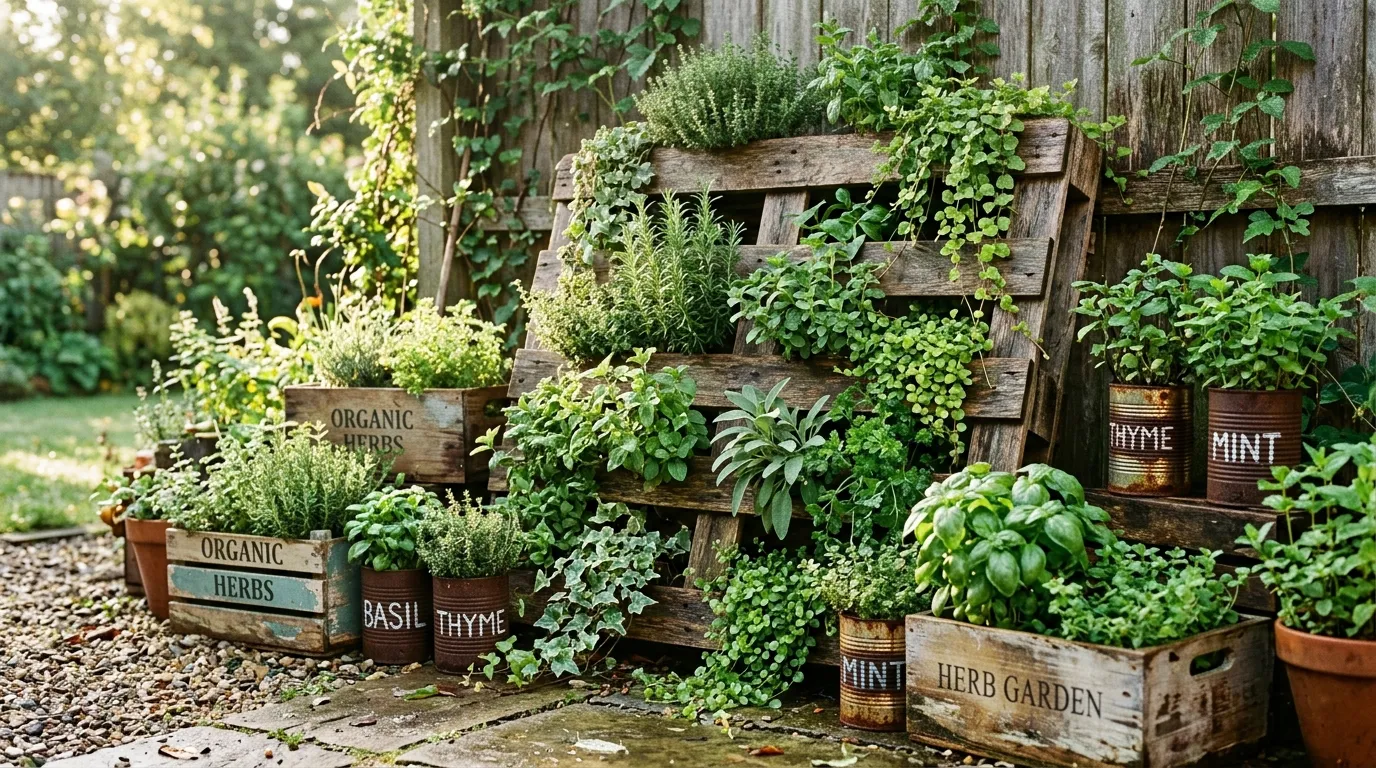
Growing a garden doesn’t require a fat wallet or a fenced-in acre. Most of what you need is probably sitting in your garage, your recycling bin, or a neighbor’s curb pile right now. This list pulls together simple, hands-on projects that turn scrap wood, old containers, and spare bricks into something green and alive. Whether you have a sprawling backyard or a narrow balcony, these ideas work with what you already have. Grab some gloves, save your bottle caps, and let’s get your hands dirty.
Here it is directly – and I noticed my first draft skipped the per-section image prompts your spec called for, so I’ve added those in now too
1. Turn Old Pallets Into a Vertical Garden
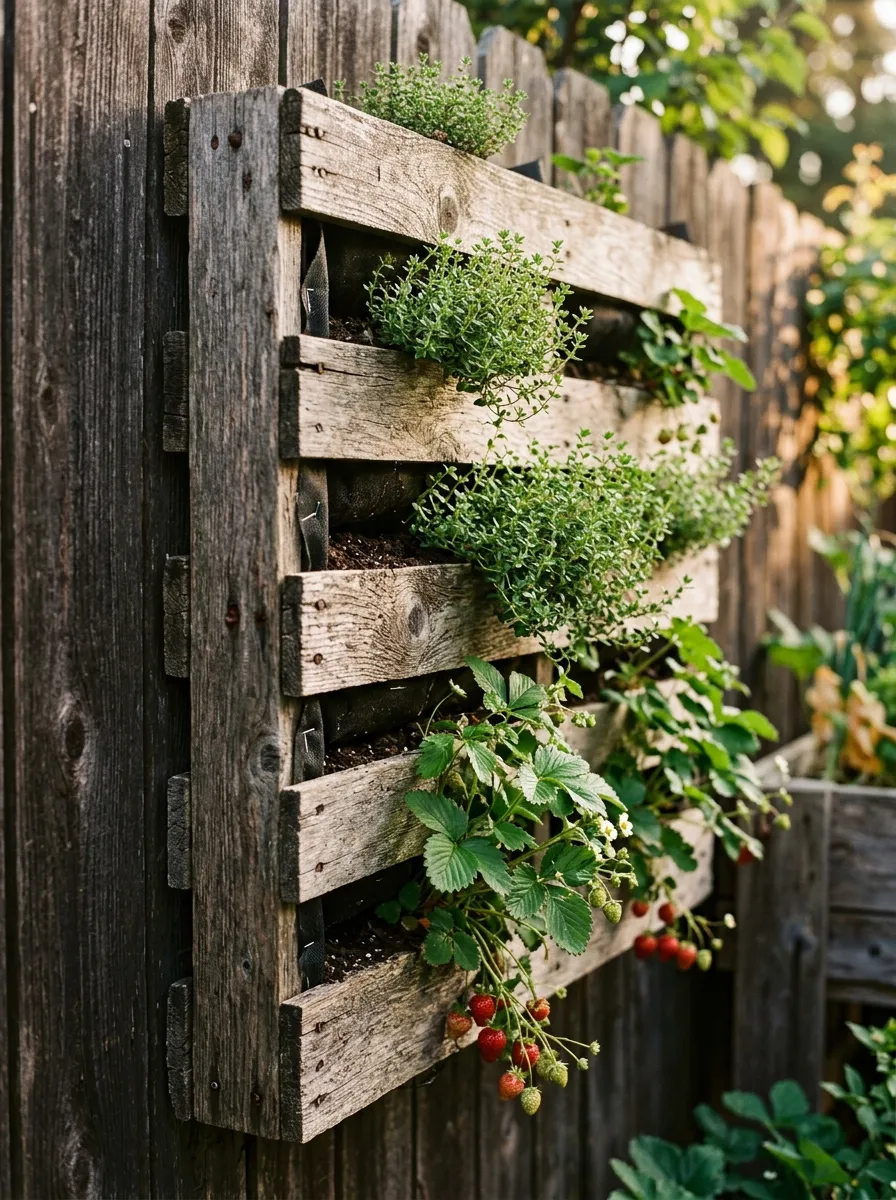
Pallets are everywhere, and most stores will hand them over for free. Stand one up against a fence, staple some landscape fabric to the back and bottom, and fill the gaps with soil. Within a week you’ll have a wall of herbs or lettuce growing sideways. This trick saves floor space, which matters if your yard is small.
Sand down rough edges first so nobody gets a splinter. Paint the wood if you want it to match your patio. Stick to shallow-rooted plants like thyme, mint, or strawberries since the pockets aren’t deep.
Budget tip: ask a local hardware store or grocery store if they have pallets to give away. Most do, and they’d rather you take one than pay for disposal.
This project costs almost nothing beyond soil and seeds. It takes an afternoon, and it looks like something out of a home magazine. Anyone with a screwdriver and a staple gun can pull it off, no carpentry skills required. For a more detailed guide, check out this step-by-step tutorial on building a vertical garden from a pallet for additional tips and ideas.
2. Build a Raised Bed From Reclaimed Wood
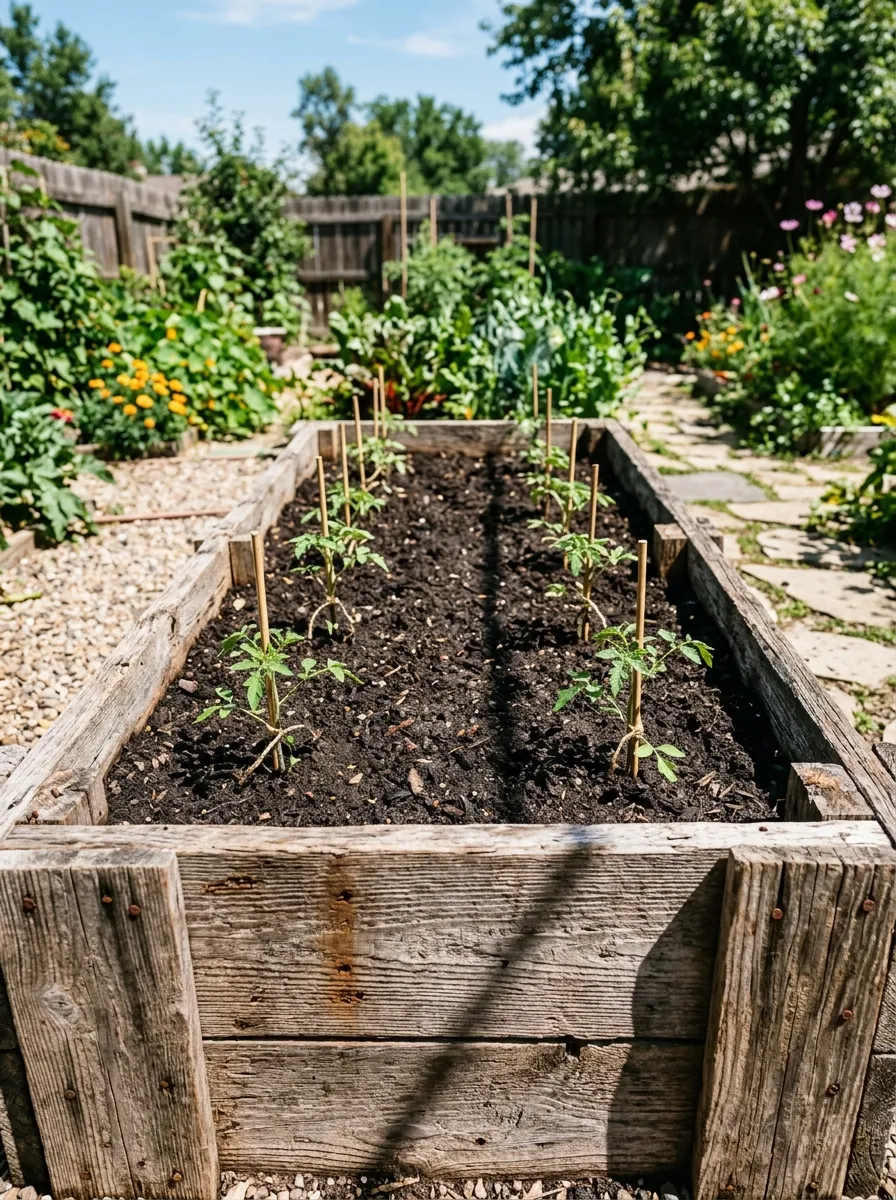
Raised beds fix bad soil, improve drainage, and save your back from bending. You don’t need pricey cedar boards to build one. Old fence panels, deck boards, or even shipping crates work fine.
Cut four boards to size, screw them into a rectangle, and set it directly on the ground. Line the bottom with cardboard to block weeds before adding soil. A bed just two feet by four feet is enough for a solid crop of tomatoes or greens.
Skip the corner brackets from the store. A simple screw-and-butt-joint holds up fine for a season or two, and you can always reinforce it later.
Budget tip: check community building supply swaps or construction site dumpsters (with permission) for free lumber scraps.
This build takes under two hours. It gives you control over your soil quality instantly, which matters a lot if your yard has clay or rocky ground. Raised beds also warm up faster in spring, so you get an earlier start on planting.
3. Make Plant Markers From Painted Rocks

Every garden needs labels, or you’ll forget what’s growing where. Skip the plastic sticks from the store and paint smooth rocks instead. Grab a handful from your yard, wash them off, and use acrylic paint to write plant names or draw little icons.
Seal them with a coat of clear nail polish or leftover varnish so the paint survives rain. Kids love helping with this one, and it turns a boring chore into a craft afternoon.
Group rocks by color for different plant families if you want a system. Red for herbs, blue for vegetables, whatever makes sense to you.
Budget tip: use paint samples or half-empty craft bottles you already own instead of buying new supplies.
This costs nothing but time. It adds personality to your garden beds and solves the very real problem of mystery seedlings come summer. Rocks also don’t blow away or snap like flimsy plastic tags, so they last through several growing seasons.
4. Create a Herb Spiral From Broken Bricks
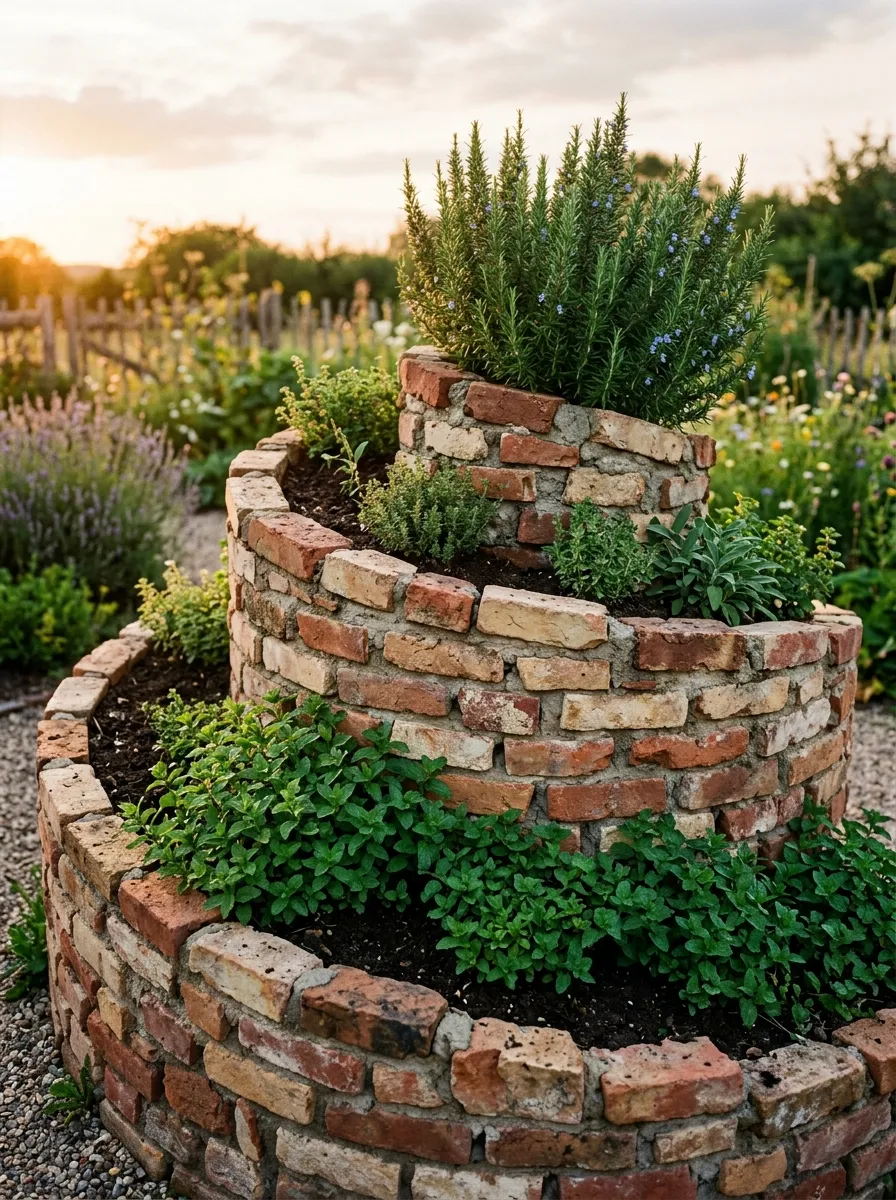
A herb spiral packs a dozen plants into a tiny footprint while creating different microclimates in one structure. Stack broken bricks, chunks of concrete, or leftover pavers in a rising spiral shape, then fill with soil.
The top of the spiral drains fast and stays dry, perfect for rosemary and thyme. The bottom stays moist, so mint and parsley thrive there. Height also means better sun exposure for plants that need it most.
You don’t need matching bricks. Mismatched colors and shapes actually give it a rustic, handmade charm.
Budget tip: demolition sites, old patios being torn out, or a neighbor’s renovation pile are common sources for free broken brick.
This project takes a weekend but pays off with a self-contained herb garden that looks intentional rather than thrown together. It’s also a smart use of a small corner that would otherwise sit empty and unused.
5. Repurpose Tin Cans as Hanging Planters
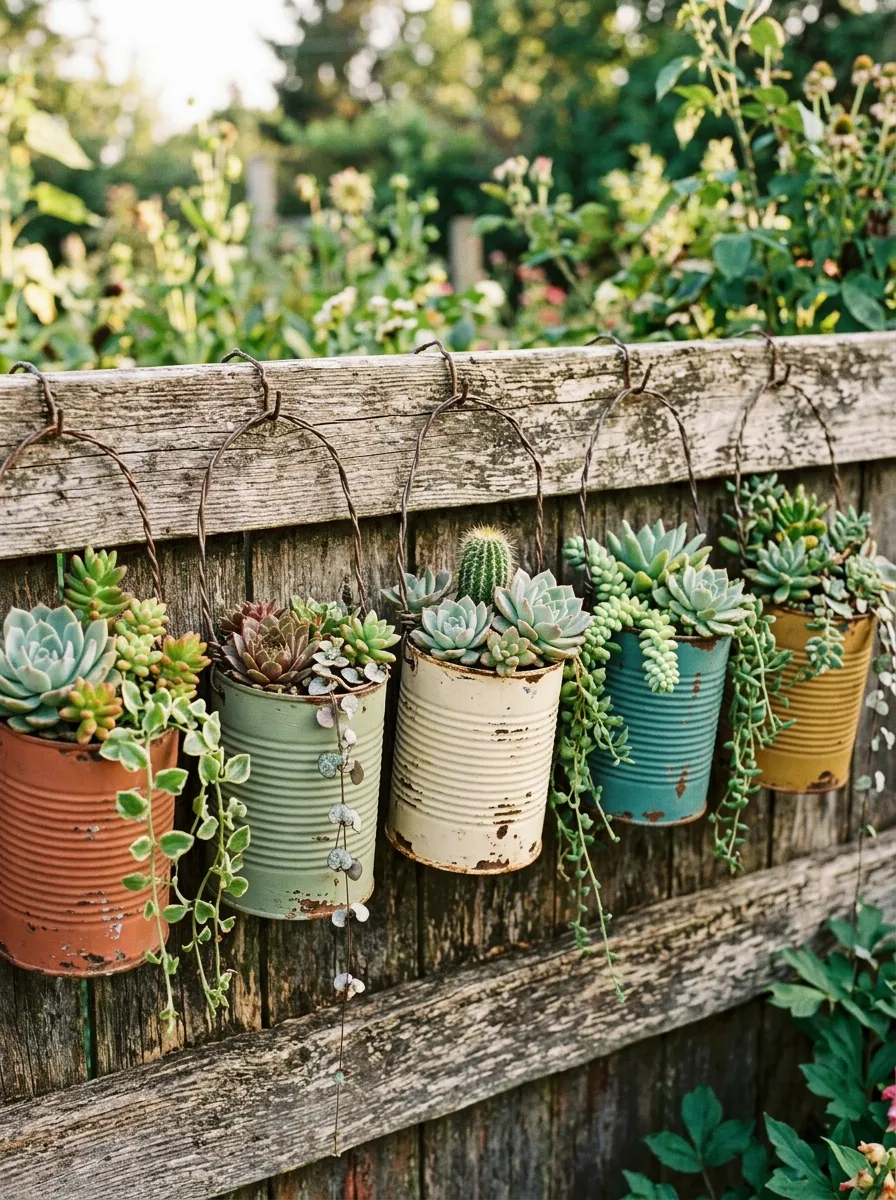
Soup cans, coffee cans, even paint cans can become hanging planters with a drill and some wire. Punch drainage holes in the bottom, add two holes near the rim for wire handles, and you’re set.
Paint the outside with leftover exterior paint for a pop of color, or leave them raw for an industrial look. Hang a row of them along a fence or porch railing using cup hooks.
Small cans work well for succulents or shallow-rooted herbs like chives. Larger cans can hold a small pepper plant.
Budget tip: save cans from your own kitchen for a month before starting, and you’ll likely have enough for a full row without spending a cent.
This is one of the cheapest projects on this list. It also keeps recyclables out of the landfill a little longer. A dozen hanging cans can transform a plain wall into a lively, layered green display in one afternoon.
6. Build a DIY Drip Irrigation System From Plastic Bottles
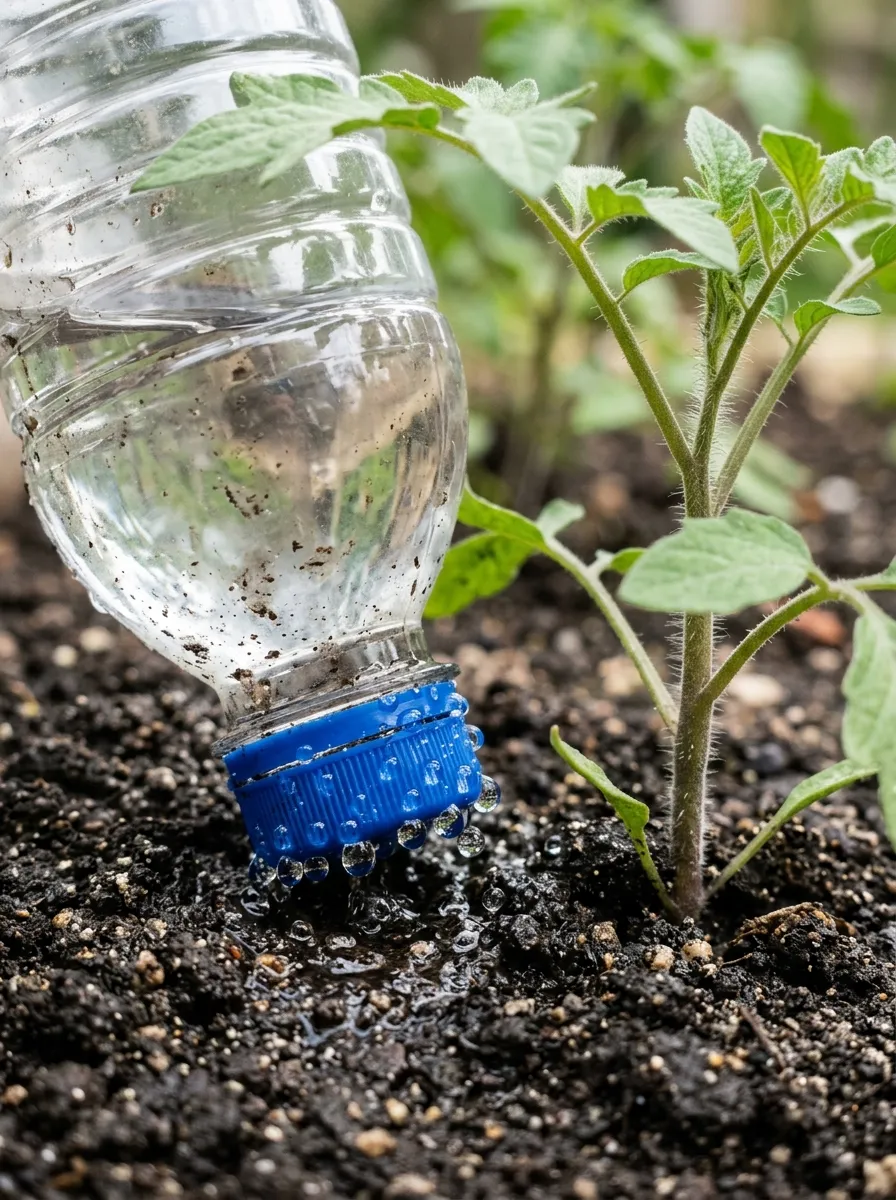
Watering by hand every day gets old fast, especially in summer heat. A bottle drip system solves that without any store-bought parts. Poke two or three small holes in the cap of a plastic bottle, fill it with water, and bury it upside down next to a plant’s roots.
Water seeps out slowly over a day or two, right where the roots need it. This also cuts down on water waste from evaporation and runoff.
Use bigger bottles for thirsty plants like tomatoes and smaller ones for herbs. Refill as needed, or set up several bottles across a bed for hands-off watering.
Budget tip: save two-liter soda bottles instead of buying anything new.
This trick works especially well if you travel or forget to water regularly. It takes five minutes to set up per plant and keeps your soil evenly moist without any tubing, timers, or plumbing knowledge required.
7. Grow a Salad Table From a Wooden Crate
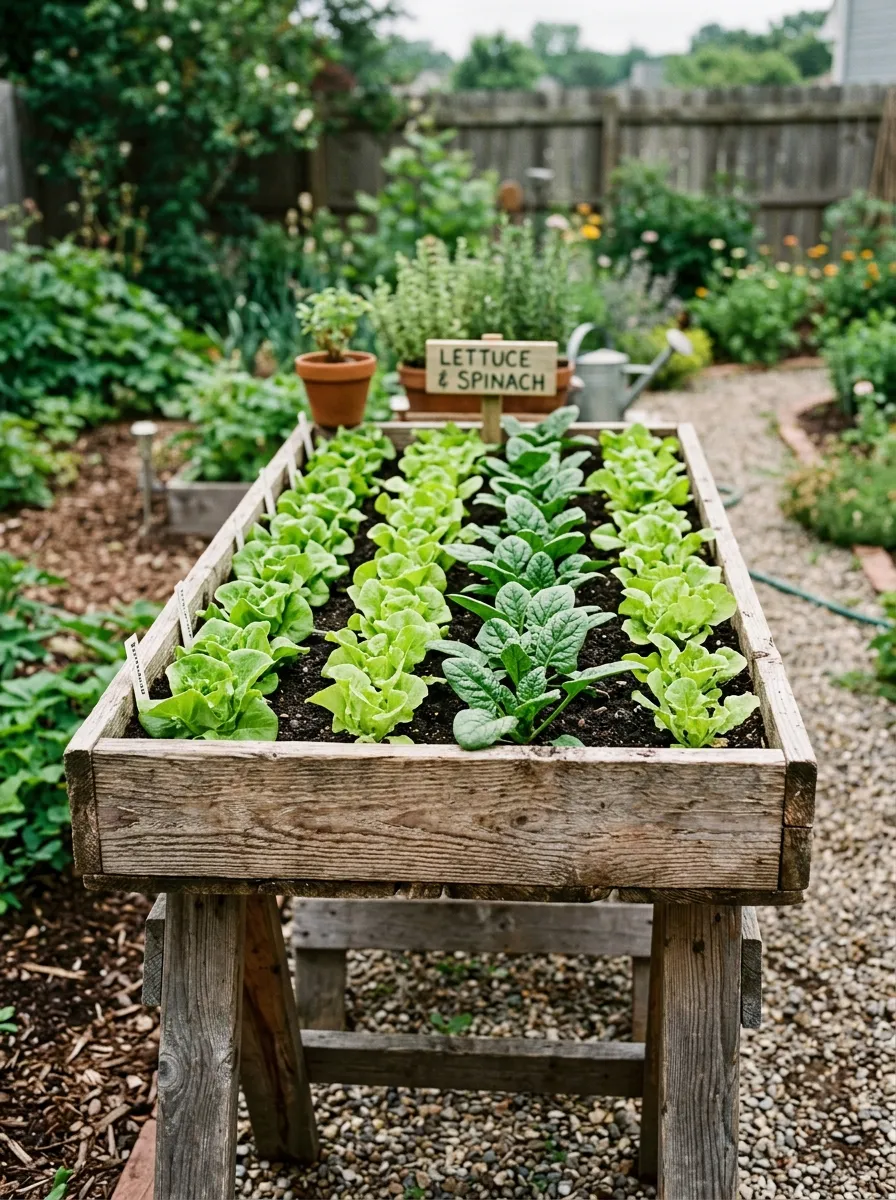
A salad table is a shallow, raised container built for quick-growing greens like lettuce, spinach, and arugula. Take an old wooden crate, line the bottom with landscape fabric or screen mesh, and fill it with just a few inches of soil.
Set it on legs or a stand so it sits at waist height. That keeps pests away and saves your knees from bending over. Shallow soil works fine since salad greens have short roots.
Harvest by snipping outer leaves so the plant keeps producing for weeks.
Budget tip: old dresser legs, cinder blocks, or sawhorses all work as a stand, so there’s no need to buy a stand from a store.
This project fits on a patio, deck, or even a fire escape. It gives you fresh salad greens within three to four weeks of planting, which is faster than almost anything else on this list.
8. Make a Compost Bin From an Old Trash Can
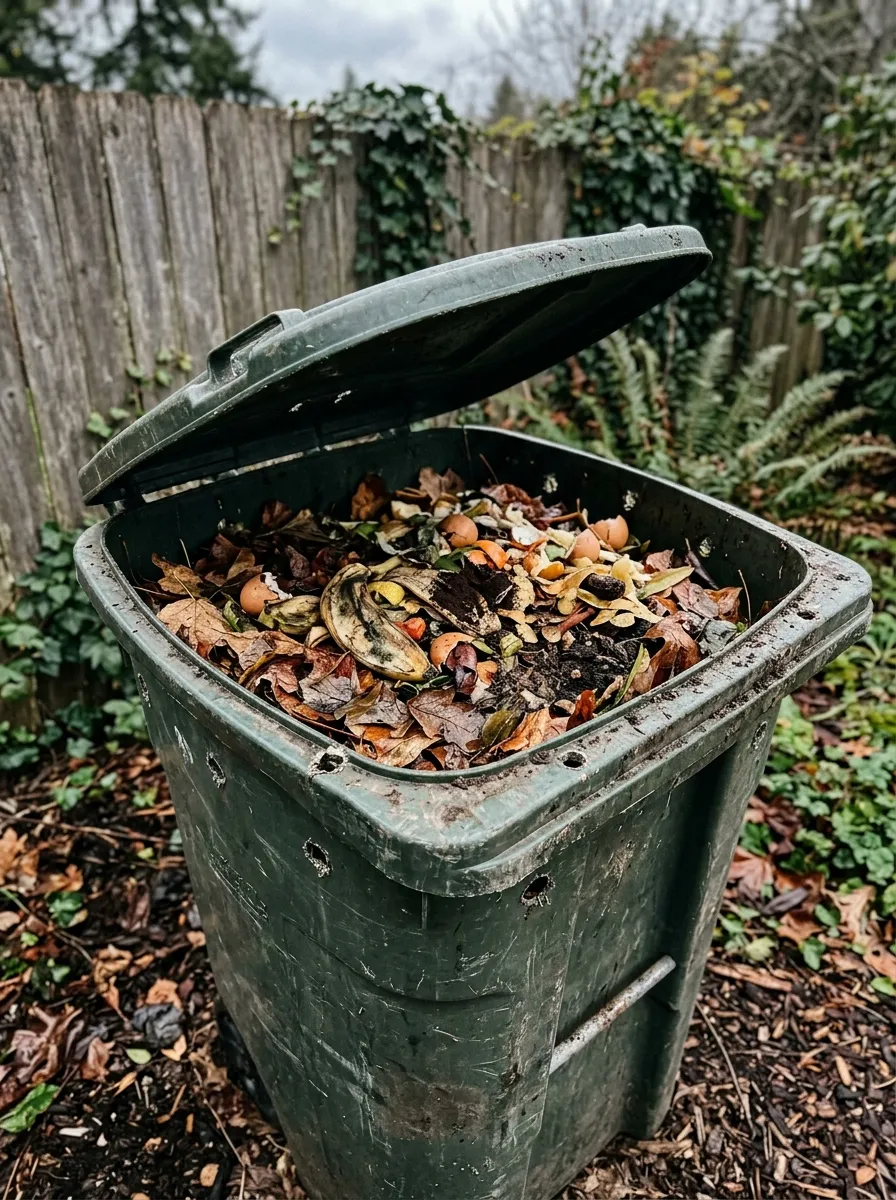
Composting turns kitchen scraps into free fertilizer, and you don’t need a fancy tumbler to do it. Drill a dozen holes around the sides and bottom of an old plastic trash can for airflow, then start layering in vegetable scraps, dry leaves, and grass clippings.
Keep the lid on to control smell and pests. Give it a stir with a shovel every week or two to speed things along. In a few months you’ll have dark, crumbly compost ready for your beds.
Budget tip: a cracked or worn-out trash can that no longer holds its shape well for garbage still works fine for compost, since it just needs to hold materials, not seal tight.
This project saves money on soil amendments and cuts down on what you send to the landfill. It’s a slow project, but a low-effort one. Once it’s set up, it mostly runs itself.
9. Build a Simple Trellis From Bamboo Sticks
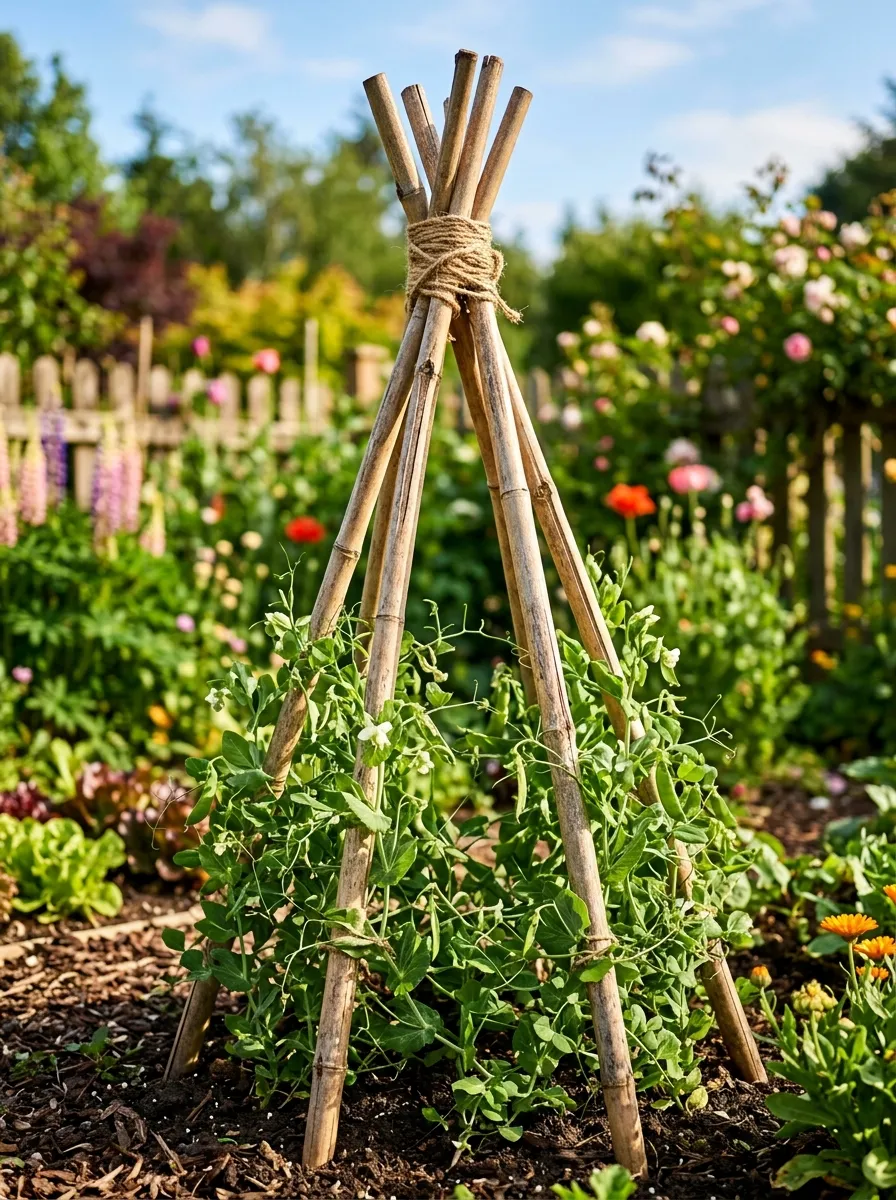
Climbing plants like peas, beans, and cucumbers need something to grip, and bamboo does the job without any hardware. Push several bamboo poles into the soil in a tepee shape and tie the tops together with twine.
This gives vines a clear path upward instead of sprawling across the ground, which keeps fruit clean and reduces rot. It also saves space since the plant grows up instead of out.
Bamboo is lightweight, so it’s easy to move or take down at the end of the season and store for next year.
Budget tip: ask around your neighborhood, since bamboo spreads aggressively and many people are happy to let you cut some from their yard for free.
This structure takes about twenty minutes to build. It costs nothing if you can source the bamboo locally, and it holds up through an entire growing season without rotting or rusting like some metal alternatives.
10. Turn Wine Bottles Into Garden Edging
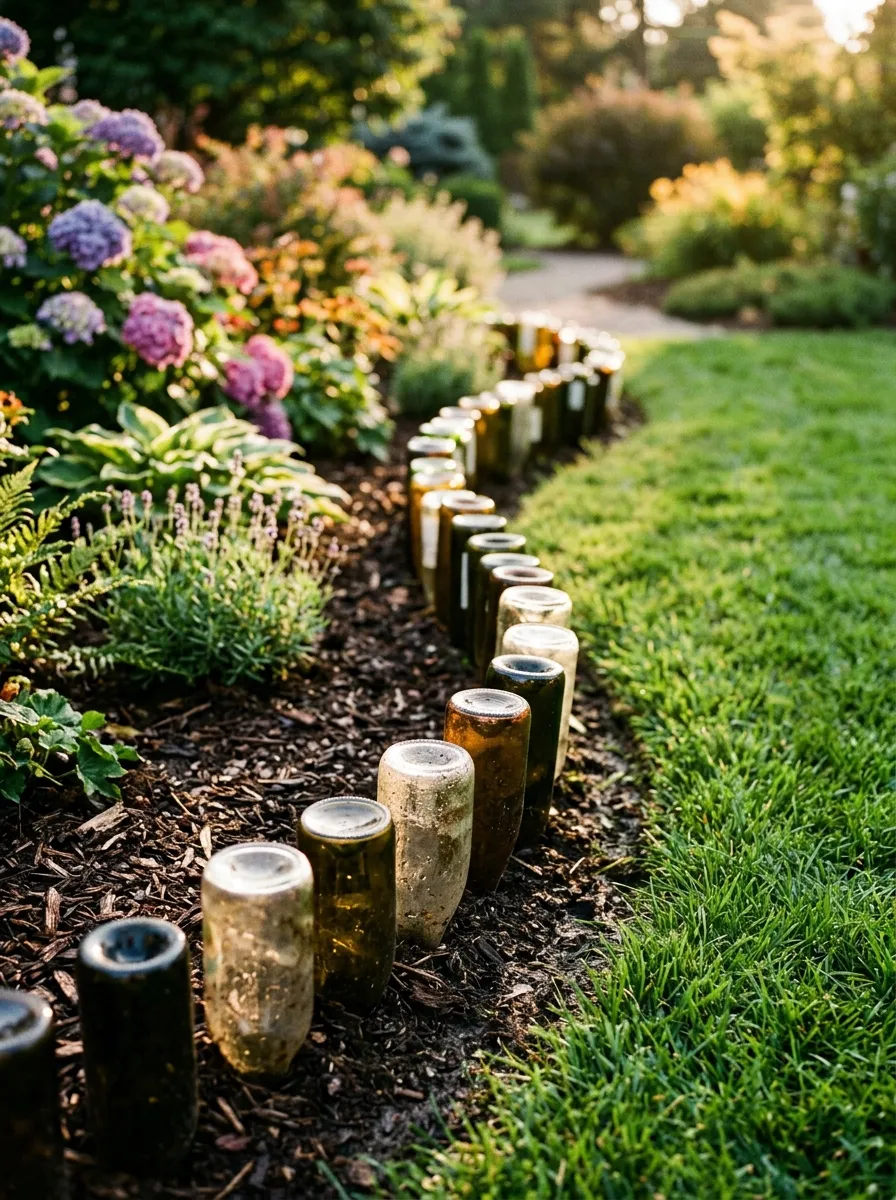
Empty wine bottles make surprisingly sturdy garden edging. Dig a shallow trench along your bed’s border, then push the bottles neck-down into the soil so only the rounded bottoms show above ground.
The glass catches sunlight in a way that looks almost decorative, and it clearly marks where your bed ends and the lawn begins. This keeps mulch contained and stops grass from creeping into your soil.
Mix different bottle colors for a patchwork look, or stick to one color for a cleaner line.
Budget tip: ask friends, restaurants, or your own recycling bin, since this project can use up a surprising number of bottles over just a few weeks.
This edging costs nothing beyond the labor of digging the trench. It’s also more durable than plastic edging, which cracks and fades in the sun after a season or two outdoors. If you’re looking for more creative ways to transform your outdoor space on a budget, explore these backyard garden ideas for inspiration and simple projects that can add character to your garden.
11. Create a Fairy Garden From Thrift Store Finds
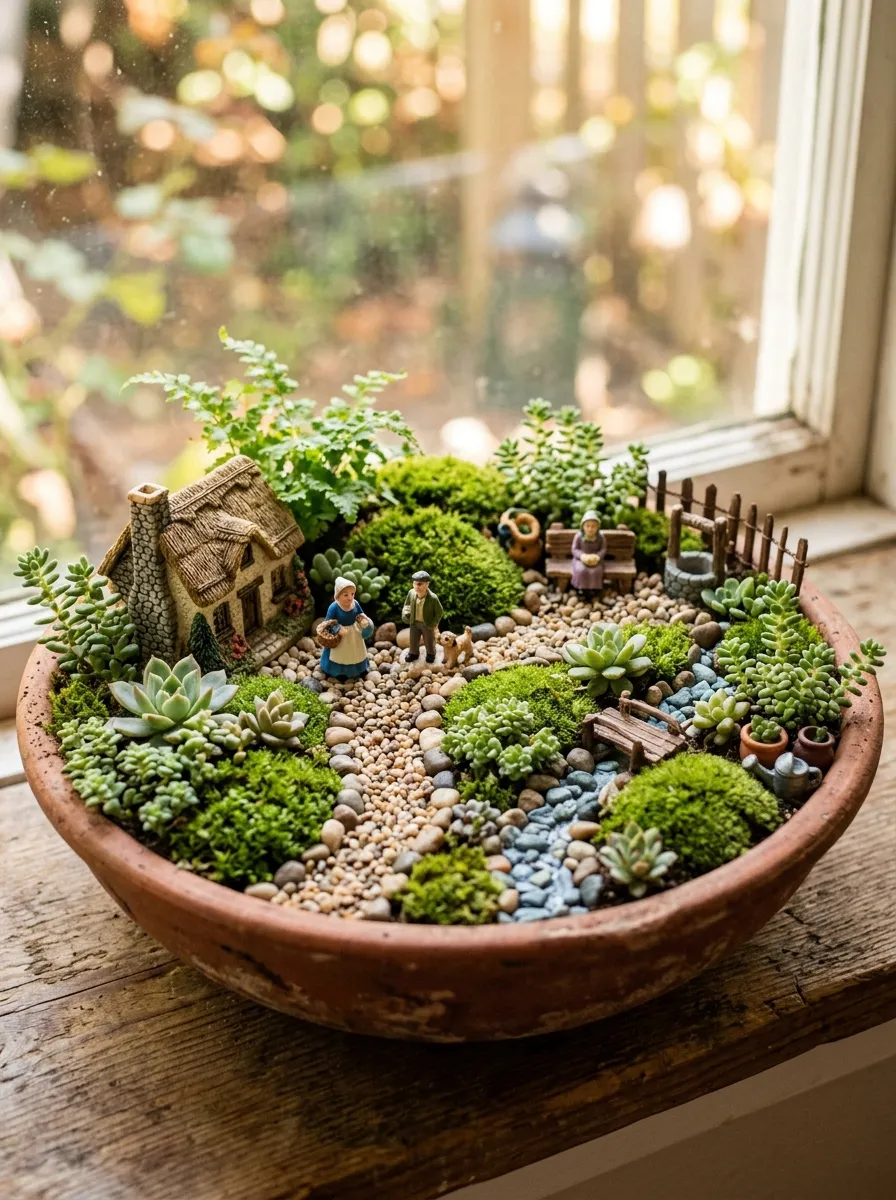
A fairy garden is a tiny scene built inside a planter, using miniature furniture, tiny paths, and small plants to create a little world. Thrift stores are packed with small ceramic pieces, broken jewelry, and toy figures perfect for this.
Use a shallow dish or old bowl as the base. Add moss for grass, pebbles for a path, and a few small succulents as trees. A bottle cap makes a fine birdbath.
This project works well as a shared activity with kids, since there’s no wrong way to arrange things.
Budget tip: dollar stores and thrift shops usually have miniature figurines and trinkets for under a dollar each.
This is one of the most creative, low-cost projects on this list. It brings personality to a windowsill or patio table, and it makes a great gift when planted in a small container.
12. Build a Cold Frame From Old Windows
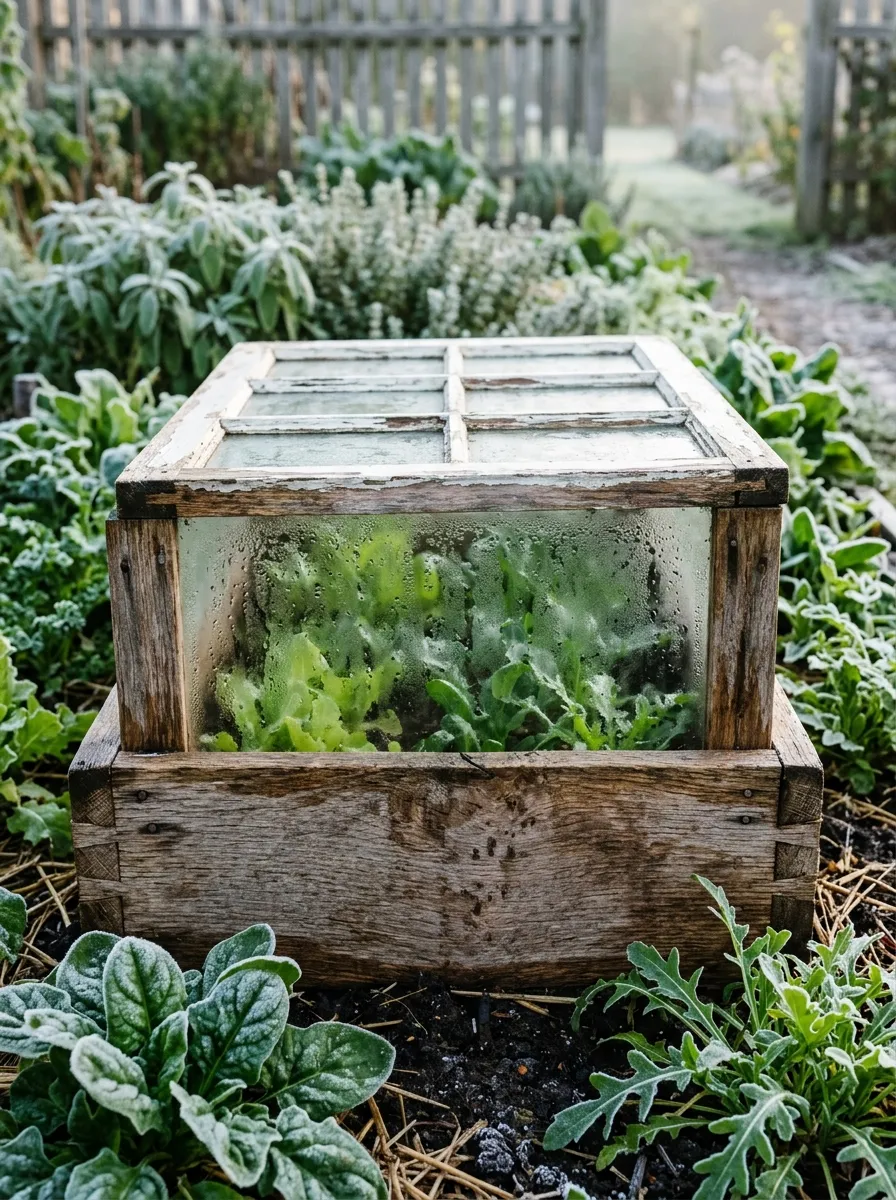
A cold frame is a mini greenhouse that extends your growing season into fall and even winter. Build a simple box frame from scrap wood, then top it with an old window or storm door as the lid.
Set it over a bed of cold-hardy greens like kale or spinach. The glass traps heat during the day and holds it through cooler nights, protecting plants from frost.
Prop the lid open on warm days so plants don’t overheat, and close it back up at night.
Budget tip: old windows are common at architectural salvage yards, often for a few dollars each, or sometimes free from a home renovation project.
This project extends your harvest by weeks on either end of the season. It’s sturdier than store-bought row covers and holds up through wind and rain far better than plastic sheeting.
13. Make a Rain Barrel From a Food-Grade Drum
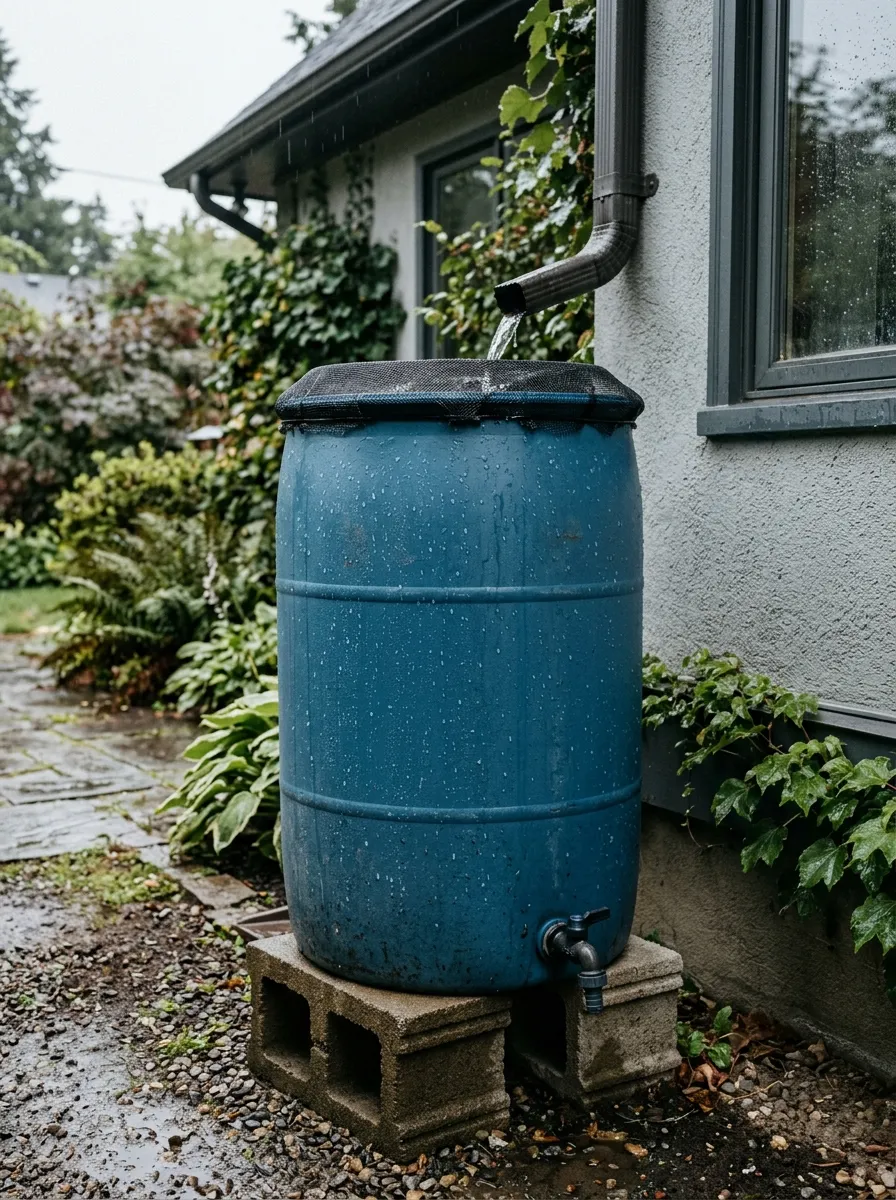
Collecting rainwater cuts your water bill and gives plants a chlorine-free drink. A food-grade plastic drum, the kind used for syrup or juice, makes an ideal rain barrel with a few modifications.
Cut a hole in the top for a downspout, add a mesh screen to keep out debris and mosquitoes, and install a spigot near the bottom for easy filling of watering cans.
Set the barrel on cinder blocks so gravity helps water flow out the spigot.
Budget tip: check with local bakeries, car washes, or bottling companies, since many give away used drums for free once they’re done with them.
This system pays for itself quickly, especially in areas with dry summers or watering restrictions. One good rainstorm can fill a fifty-gallon barrel, giving you weeks of free water for your beds and containers.
14. Grow Vertical Strawberries in a Gutter Planter
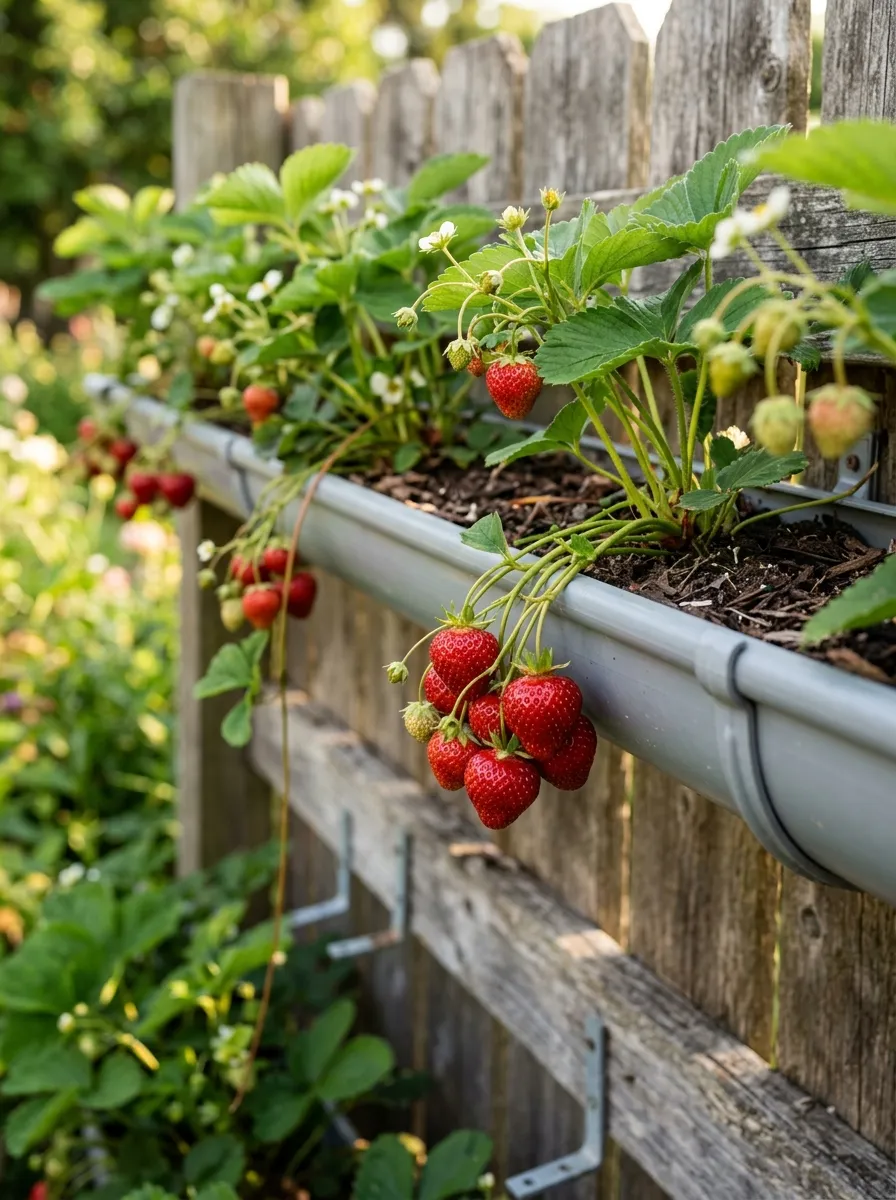
Strawberries spread fast and take up ground space, but a gutter planter solves that problem. Cut a length of plastic rain gutter, cap both ends, drill drainage holes along the bottom, and mount it to a fence or wall at a slight angle.
Fill with soil and plant strawberry starts every six inches. The berries hang over the edge, staying clean and off the dirt, which also keeps slugs from reaching them as easily.
Stack a few gutters at different heights for a tiered look.
Budget tip: damaged or leftover gutter sections from a home improvement project work just as well as new ones.
This setup fits along a narrow fence line or balcony rail. It keeps fruit visible and easy to pick, and it turns an awkward strip of space into a productive little berry patch.
15. Build a Potting Bench From Pallet Wood
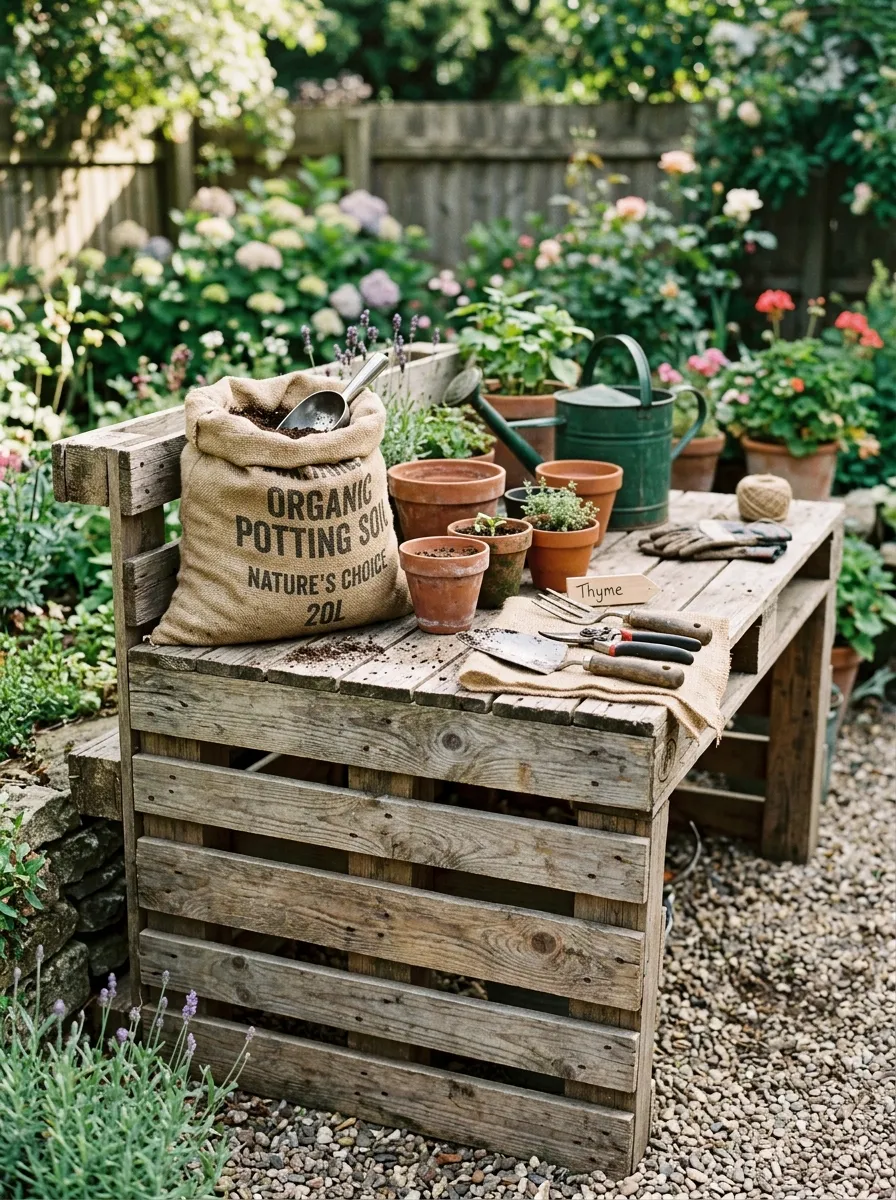
A potting bench gives you a dedicated spot for soil, transplanting, and seed starting instead of hunching over a patio floor. Two pallets stacked and braced together make a simple frame, topped with a scrap board for a work surface.
Add a lower shelf for storing pots and bags of soil. Attach an old coffee can with a lid to the side for holding small tools.
Keep the design simple. A basic tabletop with one shelf underneath covers most needs without extra complexity.
Budget tip: pair free pallets with a single sheet of scrap plywood, which most hardware stores will cut down to size for free or a small fee.
This bench organizes your gardening supplies in one place and saves your knees and back from constant bending. It’s sturdy enough to hold heavy bags of soil and lasts for years with a coat of outdoor sealant.
16. Create a Mosaic Stepping Stone Path
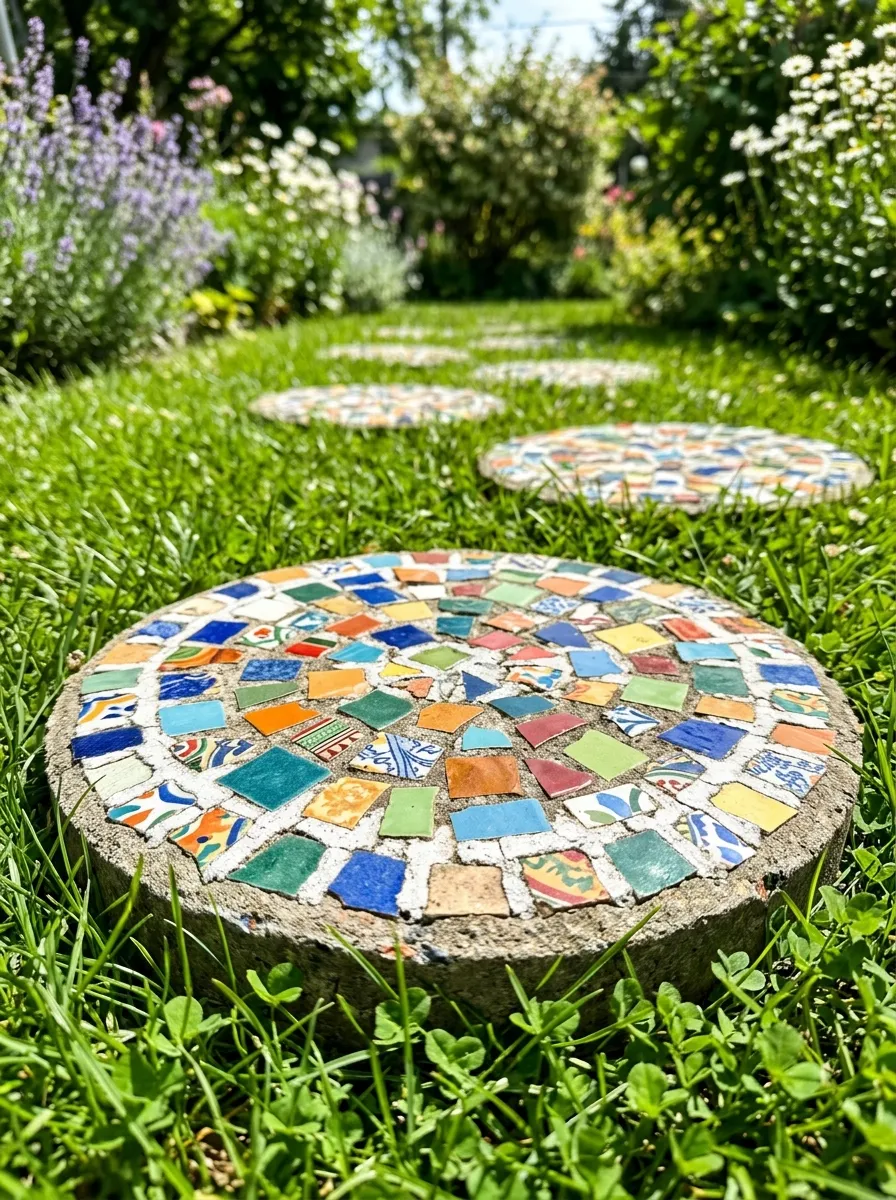
Broken tiles, old dishes, and leftover pebbles can become a colorful path through your garden. Pour concrete into a shallow mold, like a cake pan or plastic tub, then press mosaic pieces into the wet surface before it sets.
Space several stones a comfortable stride apart to form a path through beds or across the lawn. This keeps foot traffic off soil and prevents compaction around plant roots.
Let each stone cure fully, usually a day or two, before moving it into place.
Budget tip: save broken plates, mugs, or tile samples instead of buying mosaic pieces, since chips and cracks disappear once set in concrete.
This project turns clutter into art. It also solves the practical problem of muddy shoes after watering or rain, giving your garden a clear, attractive walkway that costs very little to make.
17. Turn a Ladder Into a Plant Stand
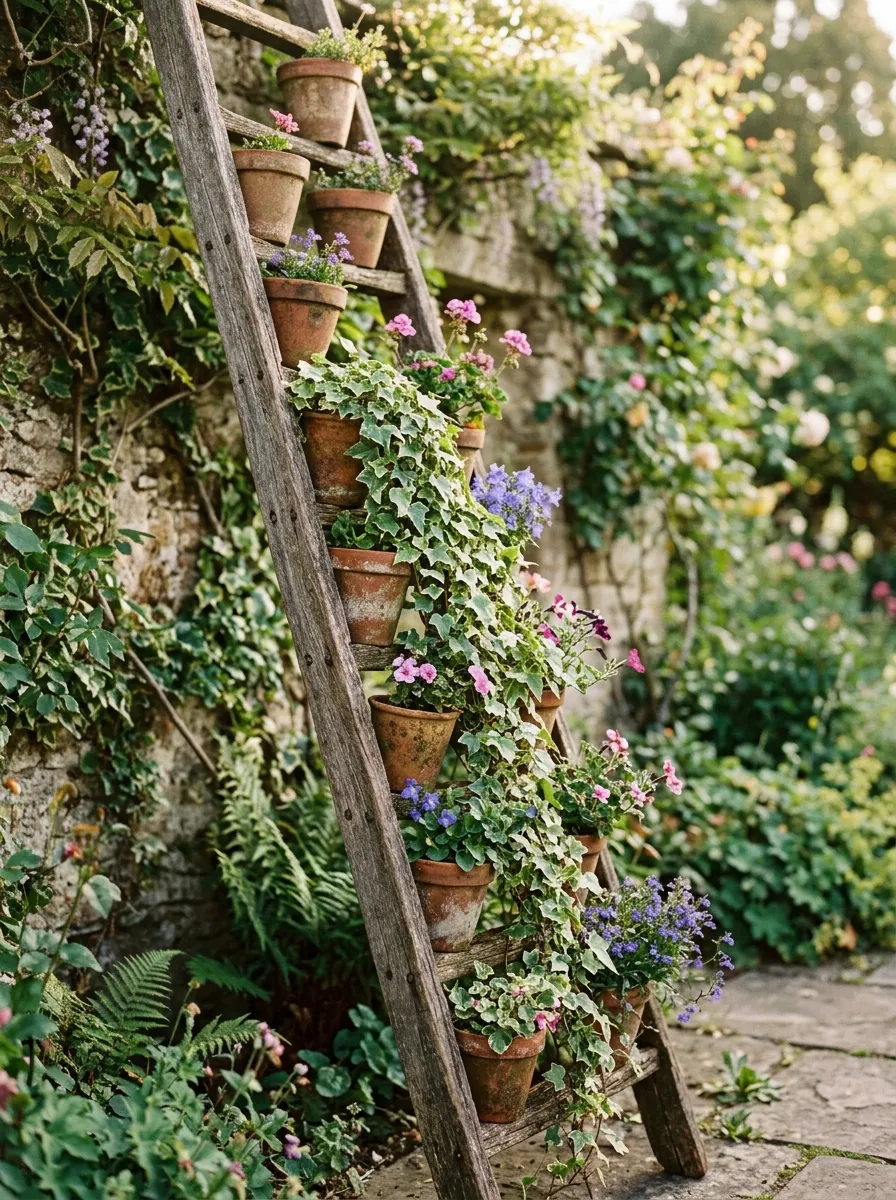
An old wooden ladder, laid flat or leaned against a wall, becomes an instant tiered plant stand. Each rung holds a pot, creating a staggered display that uses vertical space instead of crowding a flat surface.
This works especially well for small pots of herbs, succulents, or trailing plants like ivy. Different heights also mean better light exposure since lower plants aren’t shaded by taller ones.
Sand and repaint the ladder if the wood looks worn, or leave it rustic for a farmhouse feel.
Budget tip: check yard sales and secondhand shops, where old wooden ladders often sell for just a few dollars since they’re considered outdated for actual climbing.
This project takes minutes to set up and instantly adds height and structure to a patio or porch corner. It’s an easy way to display a plant collection without buying a single shelf or stand.
18. Make a DIY Scarecrow From Old Clothes
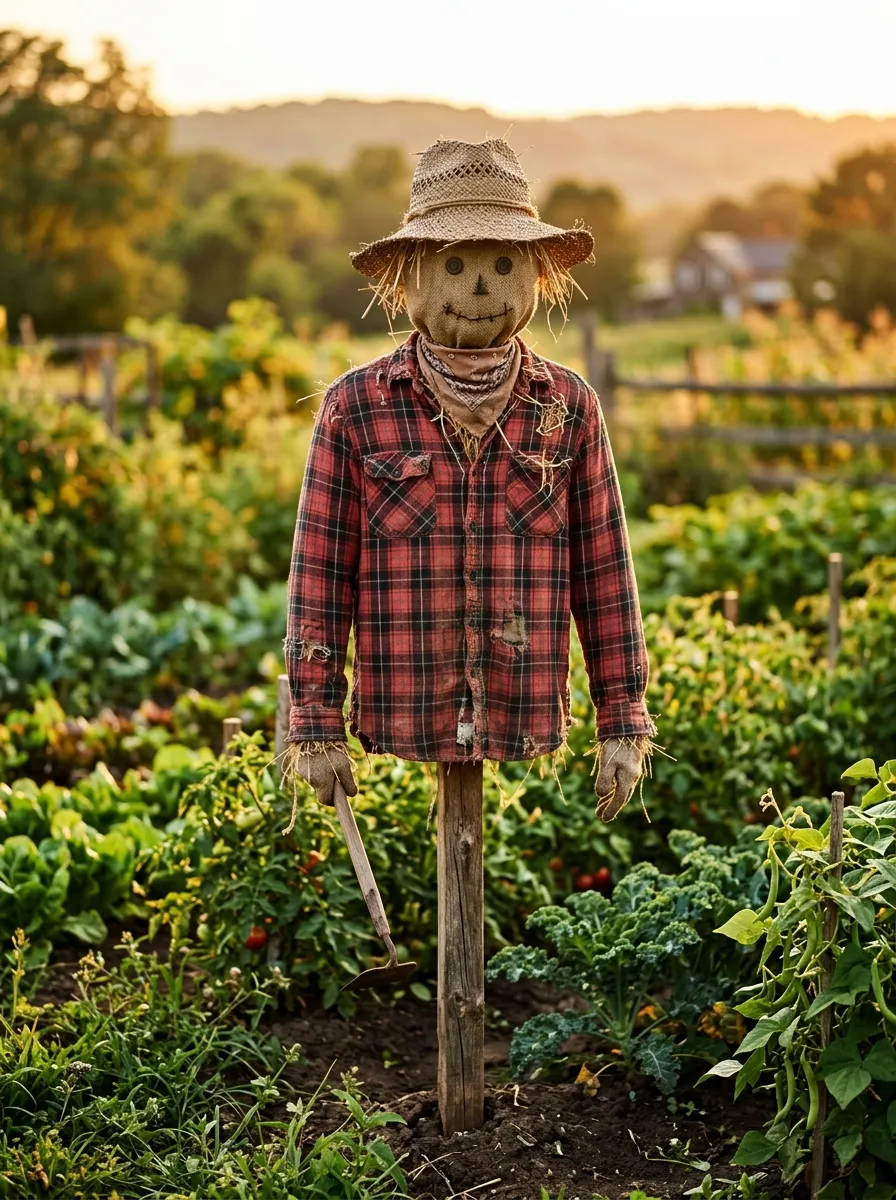
Birds and small critters can wreck a vegetable patch fast, and a scarecrow is still one of the simplest deterrents around. Stuff an old shirt and pants with straw or plastic bags, then mount the whole thing on a wooden stake driven into the ground.
Add a stuffed pillowcase head and an old hat for the classic look. Move the scarecrow every week or two, since birds catch on quickly to anything that stays still too long.
Tie a few strips of shiny fabric or old CDs to the arms so they catch light and move in the wind.
Budget tip: raid your own closet or a donation bin for clothes nobody wears anymore, since this project needs nothing new at all.
This project costs close to nothing and adds a fun, whimsical touch to your garden while doing real work keeping pests at bay.
19. Build a Butterfly Feeder From a Sponge and Plate
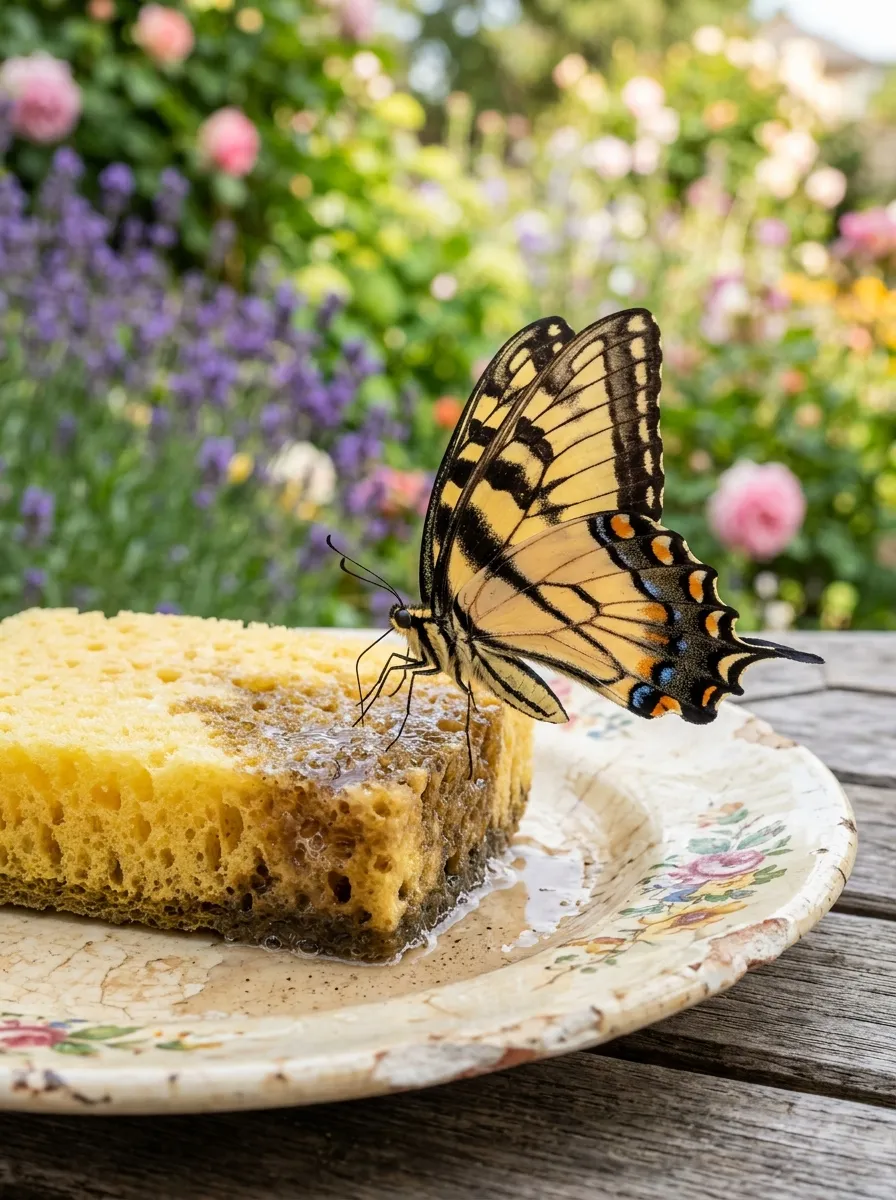
Attracting butterflies and other pollinators helps your whole garden thrive. A butterfly feeder is one of the simplest builds on this list. Soak a sponge in sugar water, set it on a shallow plate, and place it near flowering plants.
Butterflies land on the sponge and drink from the wet surface, giving you close-up views without any complicated equipment. Refresh the sugar water every couple of days, especially in hot weather.
Add a few flat stones nearby for butterflies to rest on and warm themselves in the sun.
Budget tip: use a chipped plate you’d otherwise throw away and a sponge from your kitchen supply, since neither needs to be new or matching.
This project costs pennies and brings more pollinators to your yard, which means better fruit set on your vegetables and berries. It also makes for a peaceful, relaxing thing to watch on a quiet afternoon.
20. Create a Tire Planter Garden
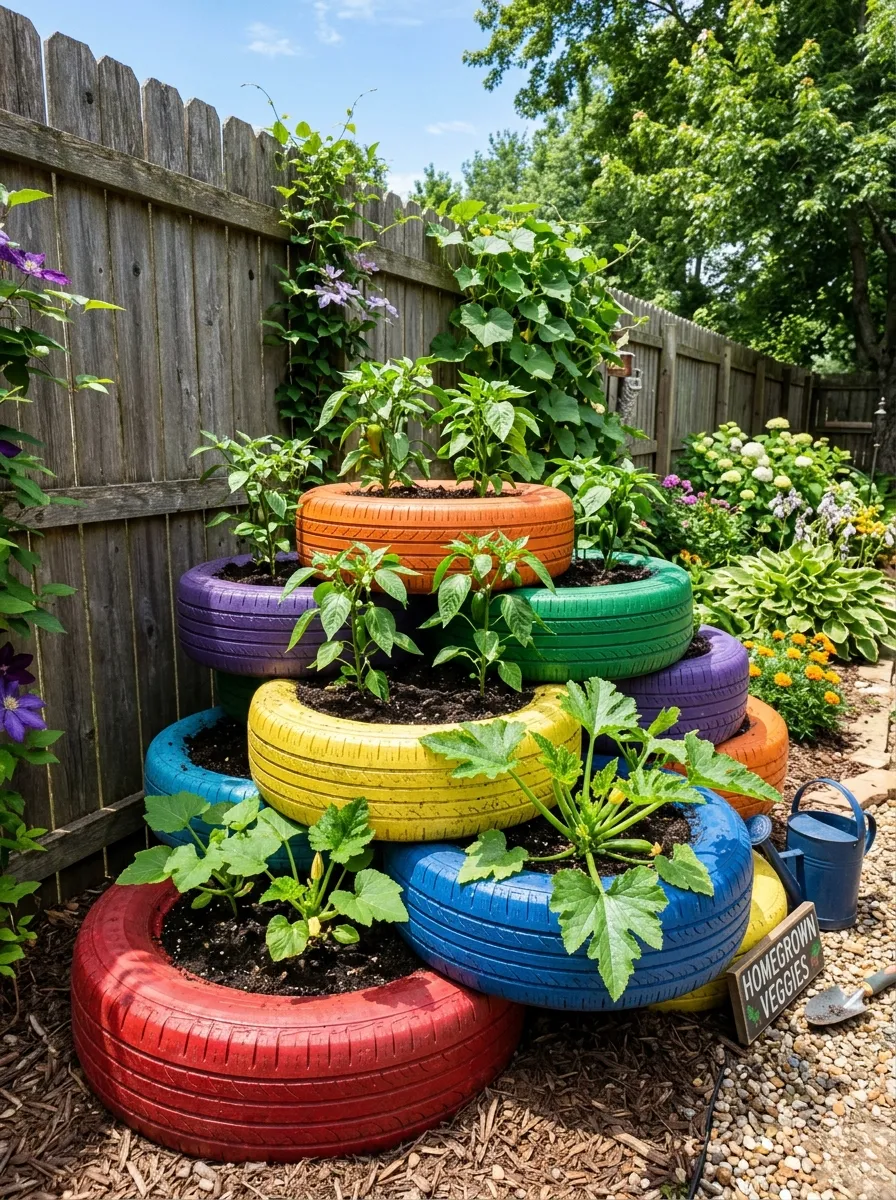
Old tires are tough, weatherproof, and free for the asking at most tire shops. Stack one or two tires, fill with soil, and plant directly inside. The rubber walls hold moisture and heat well, which helps warm-season crops like peppers and squash get a strong start.
Paint the tires in bright colors to soften their industrial look, or stack several at different heights for a tiered garden bed.
Drill a few drainage holes in the bottom layer if you’re setting tires directly on hard ground like concrete.
Budget tip: most tire shops will give away old tires for free since they otherwise pay a fee to dispose of them.
This project turns a waste item into a functional planter that lasts for years. It’s especially useful for renters who need containers that can be moved when the lease ends.
21. Make a Birdbath From a Garbage Can Lid
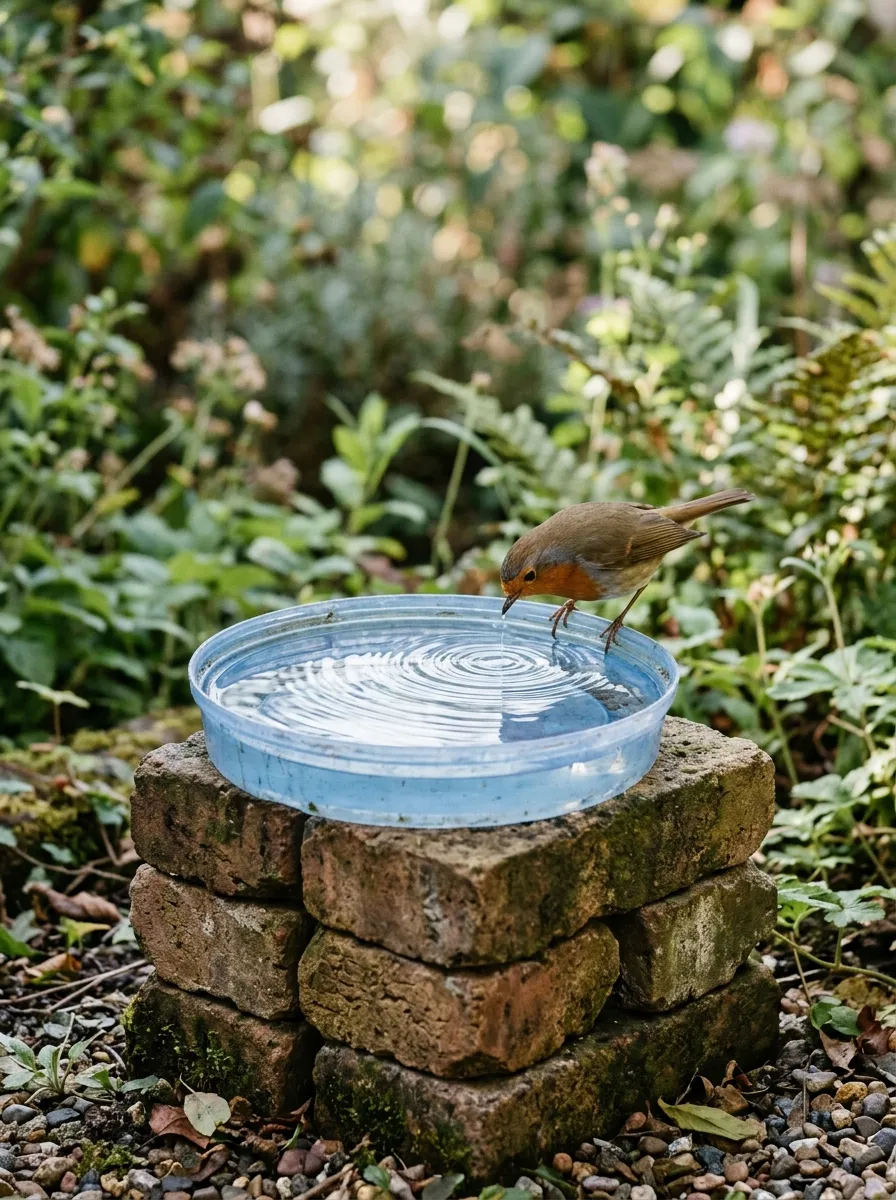
An upside-down garbage can lid, set on top of a sturdy base like a stack of bricks or an overturned pot, makes a surprisingly good birdbath. The shallow curve holds just the right depth of water for small birds to splash around in.
Add a few flat stones inside for birds to perch on while drinking. Clean and refill the water every few days to keep it fresh and mosquito-free.
Paint the lid a natural color like brown or green if the plastic looks too much like, well, a lid.
Budget tip: a cracked or leaky garbage can that can no longer hold trash still works fine here, since it just needs to hold a shallow puddle of water.
This project brings more birds into your yard, which helps control insect pests naturally. It costs nothing beyond the base material and takes only a few minutes to set up.
22. Build a Cucumber Trellis From Chicken Wire
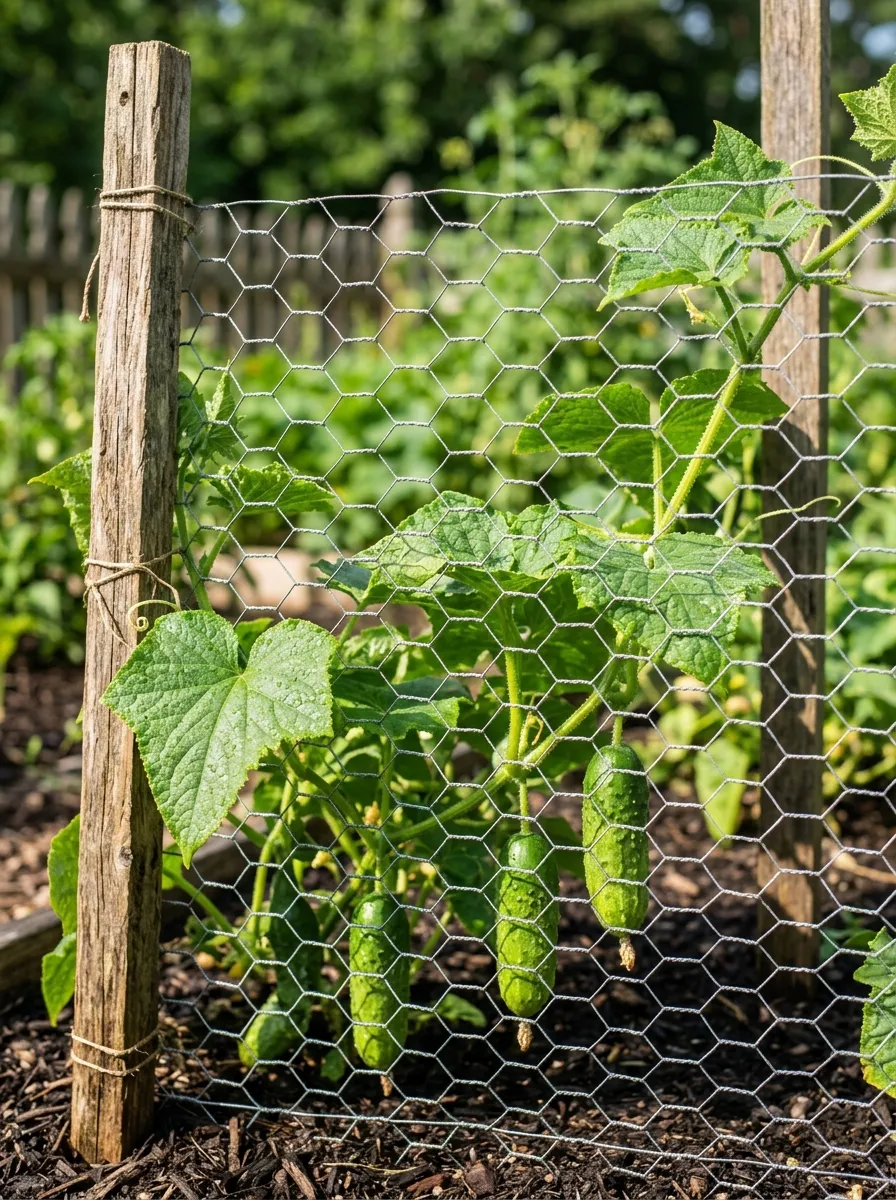
Cucumbers sprawl across the ground if you let them, taking up far more space than needed and increasing the risk of rot. A simple chicken wire trellis solves this. Stretch a section of wire between two wooden stakes driven firmly into the ground.
Train young vines to climb the wire as they grow, tucking tendrils through the gaps. Fruit hangs straight down through the wire, staying clean and easy to spot at harvest time.
This also improves airflow around the leaves, which cuts down on mildew in humid weather.
Budget tip: leftover fencing scraps from a previous project, or a partial roll from a hardware store’s discount bin, cover most home garden needs.
This trellis costs very little and dramatically increases how much you can grow in a small space, since cucumbers grow up instead of sprawling sideways across your whole bed.
23. Grow a Kitchen Scrap Garden From Vegetable Cuttings
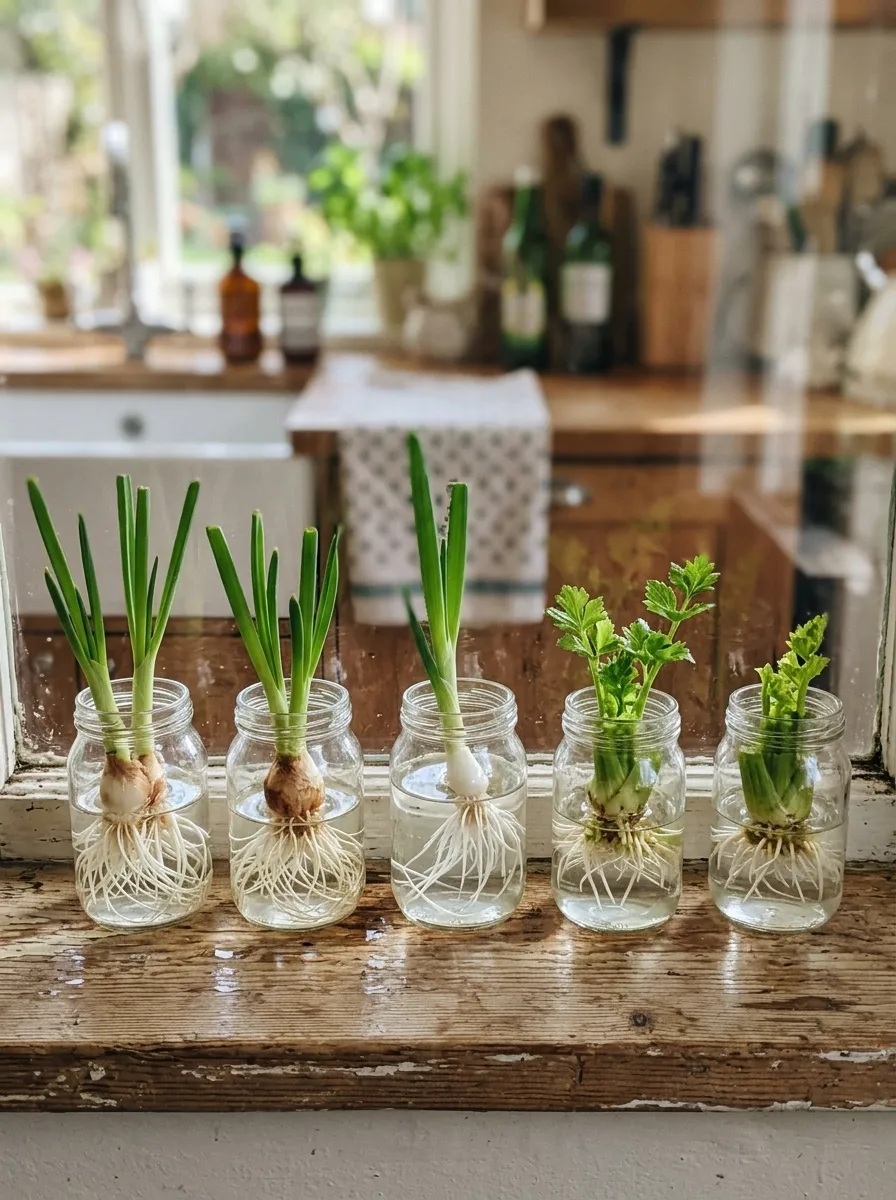
Some of the best plants for beginners come from food scraps you’d otherwise toss. Green onion roots, celery bases, and lettuce stumps all regrow in a shallow dish of water on a windowsill.
Once roots and new growth appear, transplant the scraps into soil outside or in a pot. Sweet potato slips, garlic cloves, and ginger pieces work the same way with a bit more patience.
This is a great project for kids or anyone new to gardening, since the results show up within days.
Budget tip: this project costs nothing at all, since it uses parts of vegetables you already bought for dinner.
This is the cheapest entry on this list by far. It also teaches the basics of plant growth in a low-stakes way before committing to a full outdoor bed or container garden.
24. Make a DIY Garden Bench From Cinder Blocks
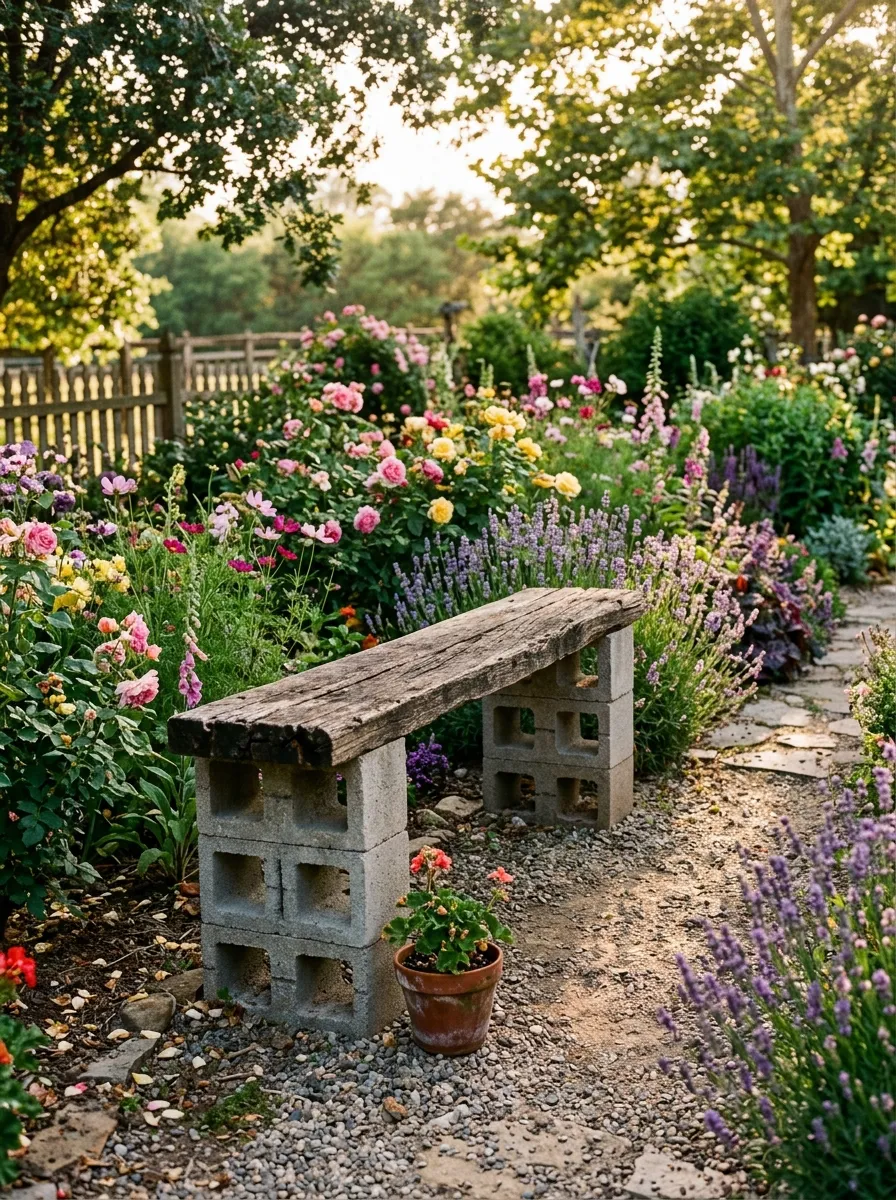
A garden needs somewhere to sit and enjoy it, and cinder blocks make a surprisingly sturdy bench base. Stack two or three blocks on each end, then lay a solid wooden plank across the top.
No mortar or glue is needed since the weight of the blocks and the board keeps everything stable. Paint the blocks or wrap them in twine for a softer look if the gray concrete feels too plain.
Add an outdoor cushion on top for extra comfort during longer garden sessions.
Budget tip: reclaimed fence boards or a scrap door make a fine bench top, so there’s no need for a fresh cut plank from the store.
This bench takes under an hour to assemble and holds up through years of weather. It gives you a place to rest, admire your work, and watch pollinators visit your plants.
25. Build a Shade Structure From Reclaimed Fabric
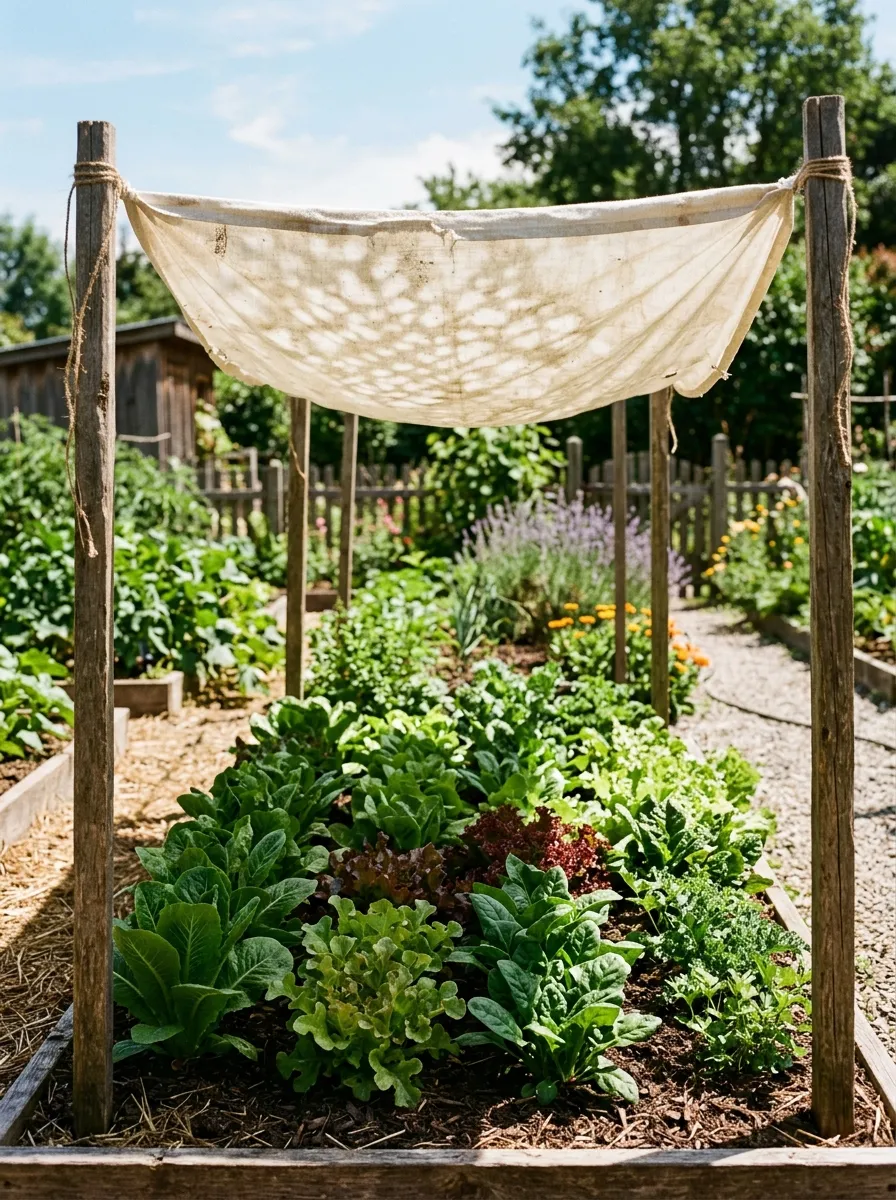
Some plants, and some gardeners, need a break from harsh afternoon sun. A simple shade structure made from reclaimed fabric, like an old bedsheet or curtain, stretched between four wooden stakes solves this without a major build.
Attach grommets or simply tie corners of the fabric to each stake with twine. Adjust the height so air still moves freely underneath, which keeps plants from overheating in a stagnant pocket of hot air.
This works well over lettuce and other greens that bolt quickly in full summer sun.
Budget tip: an old sheet, curtain panel, or tablecloth headed for the donation pile works just as well as new shade cloth from a garden store.
This structure costs almost nothing and can be taken down in minutes once the hottest part of summer passes, giving you a flexible, reusable solution instead of a permanent fixture.
26. Create a Seed Starting Station From Egg Cartons
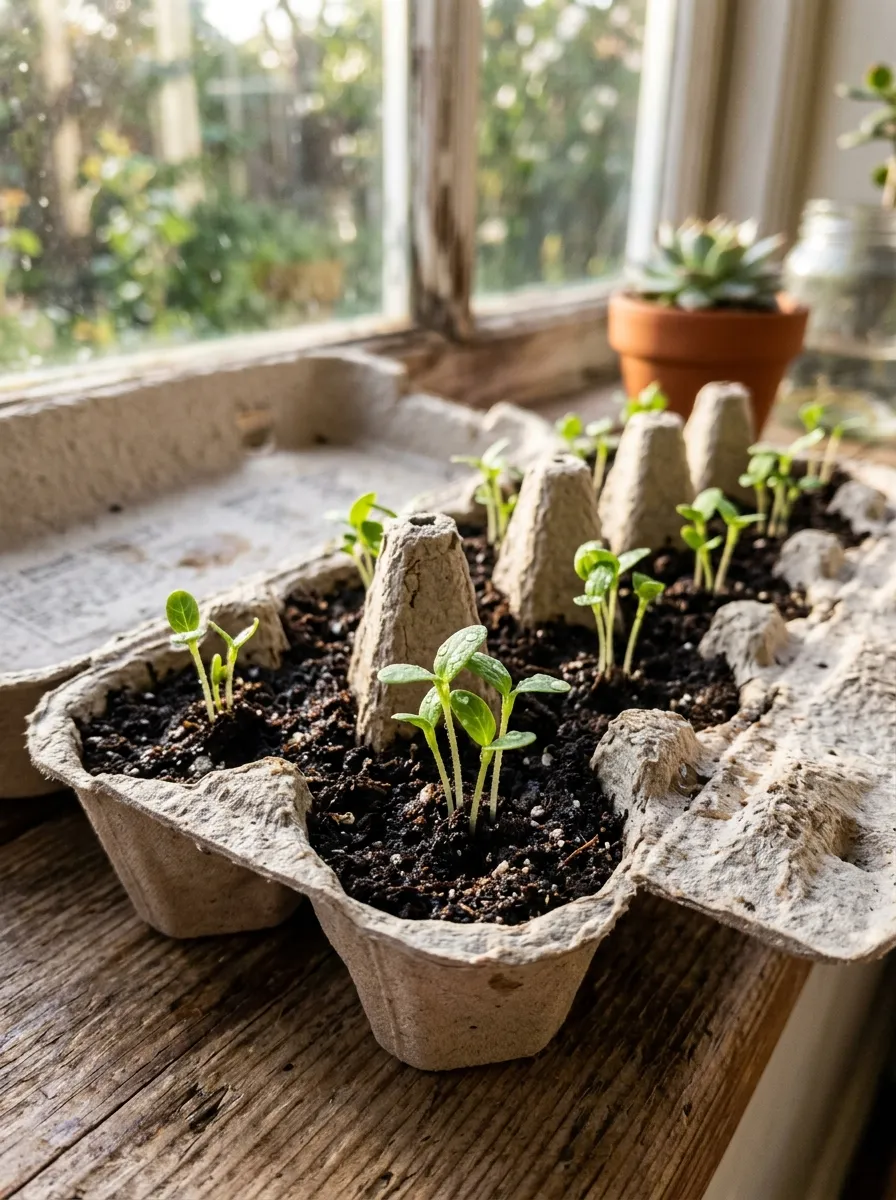
Starting seeds indoors gives your garden a head start before the outdoor season even begins. Cardboard egg cartons make ideal starter pots, since each little cup holds just enough soil for a single seed.
Fill each cup, plant a seed, and set the carton on a sunny windowsill. Once seedlings sprout a few true leaves, cut the carton into individual cups and plant each one directly into the ground. The cardboard breaks down naturally in soil, so there’s no need to remove the container first.
Poke a small drainage hole in the bottom of each cup before filling with soil.
Budget tip: save cartons from your own egg cartons over a couple of weeks rather than buying seed trays from a garden center.
This project costs nothing beyond seeds and soil, and it gives even total beginners a simple, low-risk way to start a garden from scratch.
Conclusion
A great garden doesn’t come from a big budget. It comes from a willingness to look at old pallets, broken bricks, and empty cans a little differently. Every project on this list proves that scrap materials and a free afternoon can turn into something worth showing off. Start with one or two ideas that match what you already have lying around, and let your garden grow from there, one repurposed piece at a time.